
How to: setup Smart DNS on Android
Last updated on August 20th, 2014 in Setup
 We know you all love you Android powered phones and tablets. We have decided to help those of you who are not so fluent with use of the system setting. Below you will find step by step guide to Smart DNS setup on your device. For VPN setup, please refer to our “How to” section.
Update your original IP address in our data base before using Smart DNS.
Now, that you IP is updated there is only one thing left to do. You need to change numbers of DNS servers in your Android device.
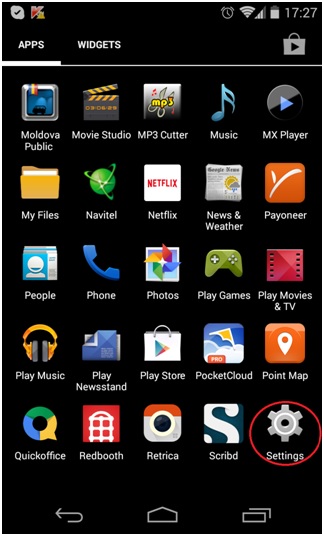
1. Go to Settings.
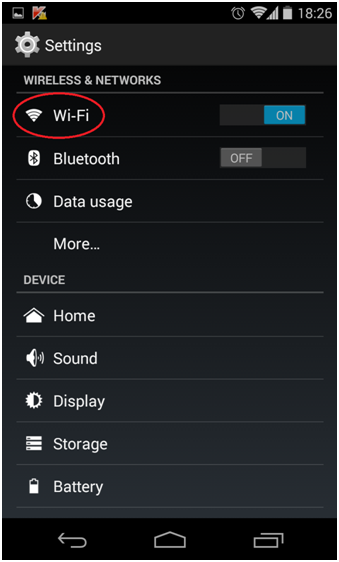
2. Access WiFi section (click on word “WiFi”, not ON/OFF switch)
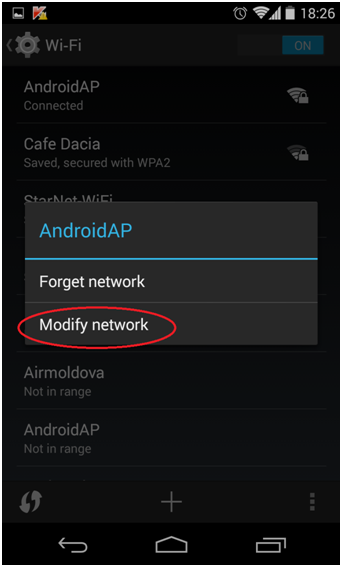
3. Press and hold preferred (or active) wireless network until dialogue pops up. Select “Modify Network”
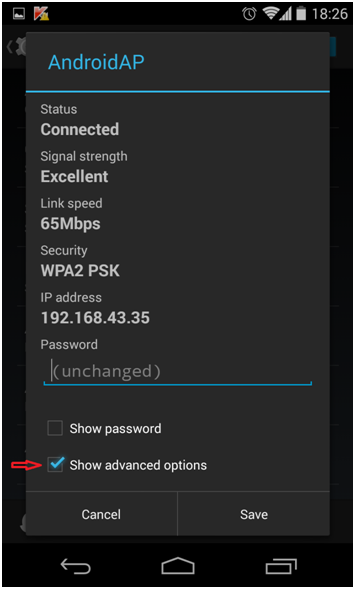
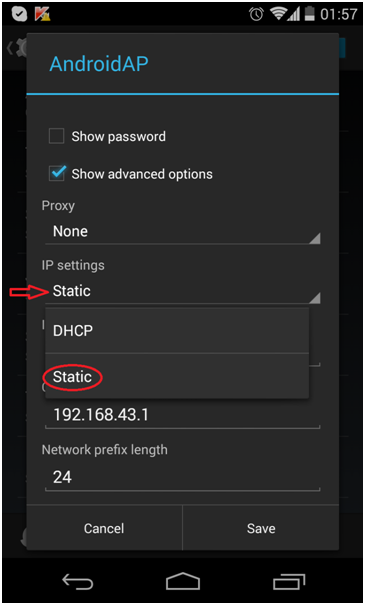
4. Check “Show advanced options” check box at the bottom
5. Switch “IP settings” to “Static”
6. Keep IP address, Gateway and Network prefix length the same (should be set from standard DHCP)
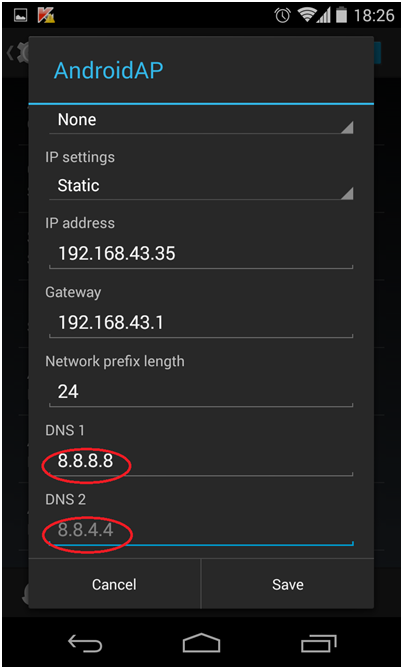
Set DNS 1 and DNS 2 with our DNS server addresses. Click here to check HideIPVPN DNS server addresses.
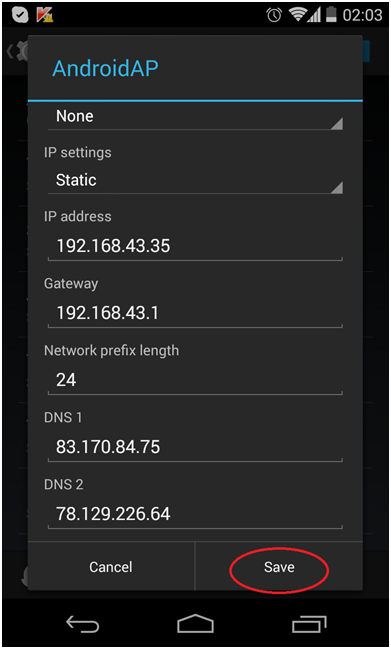
7. click on “Save” . Restart your phone (power cycle).
To find out what sites and services are unlocked via SmartDNS, follow the link.
