With our simple guide you will setup Smart DNS on XBOX 360 within few moments. Just follow steps below.
Before we start with setting up Smart DNS on XBOX 360 you need to update your IP address in our data base. Find out how to update your IP address.
Now, that your IP is updated there is only one thing left to do. You need to change numbers of DNS servers on your device.
Setup Smart DNS on XBOX 360
Setting up HideIPVPN SmartDNS service on Xbox 360 is very simple (please be advised, that you will get instant effect for all your devices by changing DNS servers on your home router). In case you still want to change it on your Xbox follow these instructions.
1. In main menu find “Settings” (1). Then select “System” (2)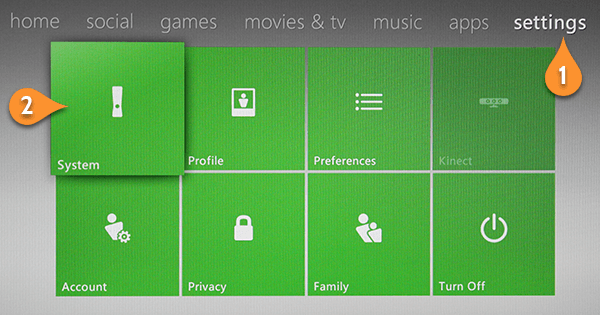

2. Select “Network Settings” (4)

3. Select Wired Network or the name of your Wi-Fi network (5).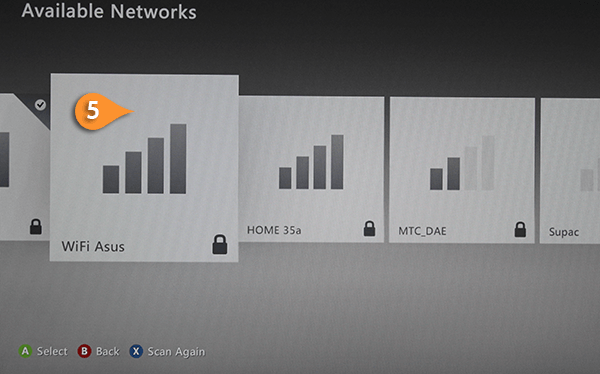
4. If you will be prompted to type your WPA2 pass, do so.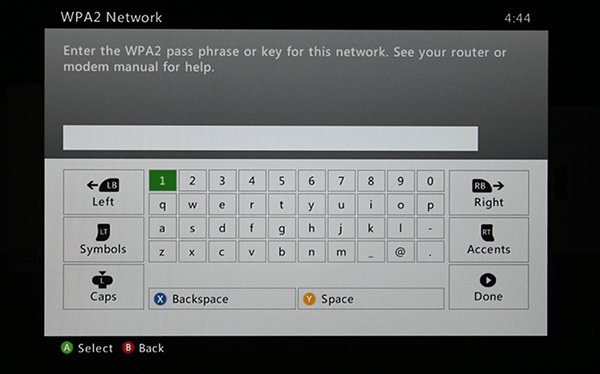
5. Test your connection to make sure it is up and running. (6)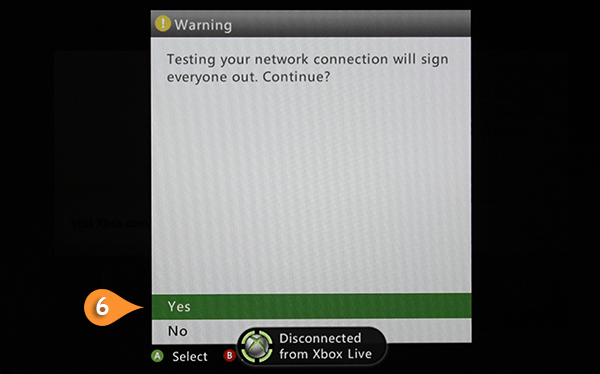
6. Select Configure Network (7)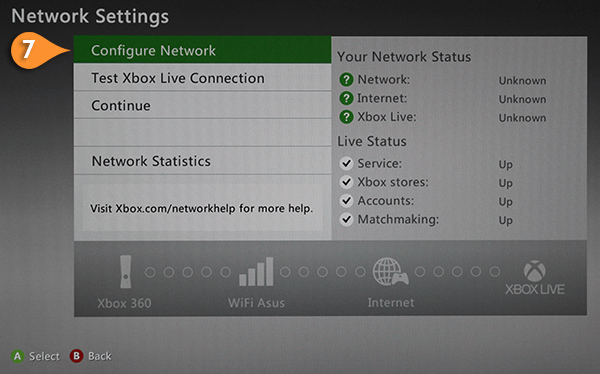
7. On the Basic Settings tab, select DNS Settings (8)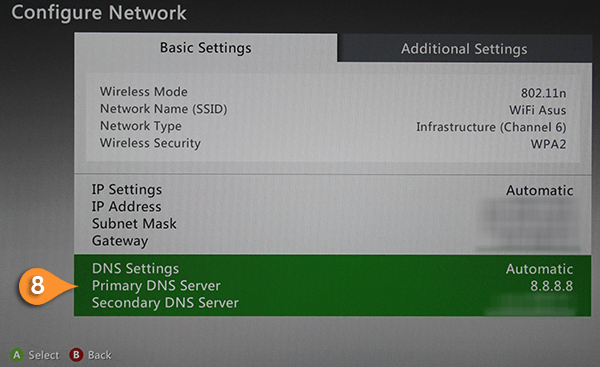

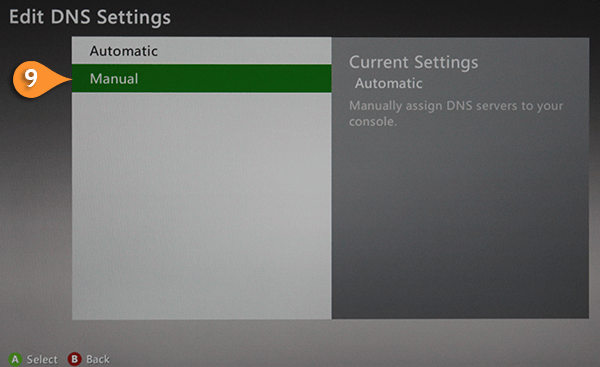
8. Choose Manual (9)
9. Click here to check HideIPVPN DNS server addresses. You will need to introduse Preferred DNS as primary DNS and Alternate DNS as Secondary DNS.
Choose Primary DNS Server (10). 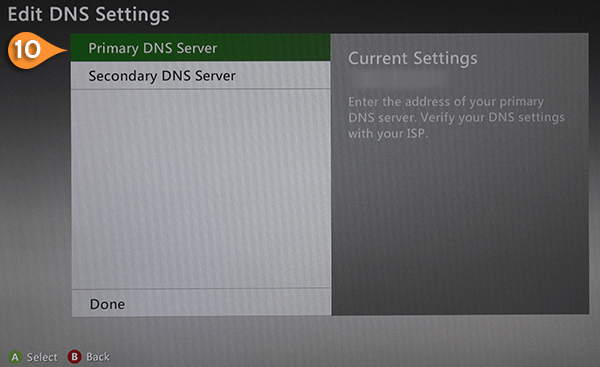
10. Type your Preferred DNS (11) and select DONE.
11. Choose Secondary DNS Server.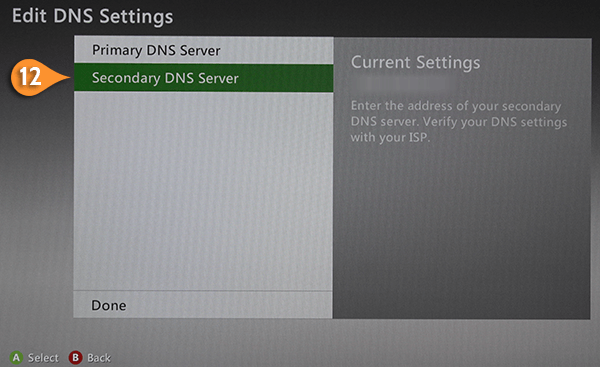
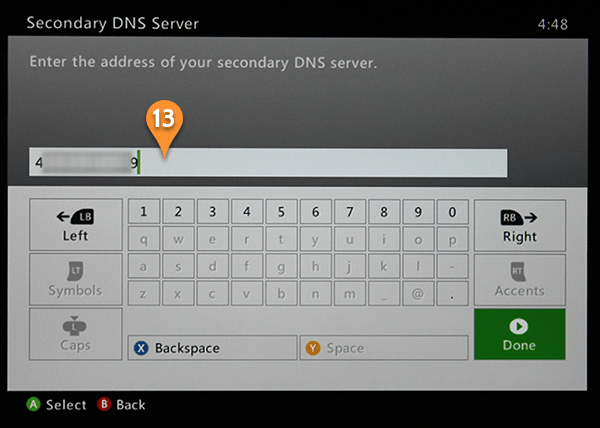
12. Type your Alternate DNS (13) and press again “Done”

13. Press the B button on your controller, and then select “Test Xbox LIVE Connection” (14).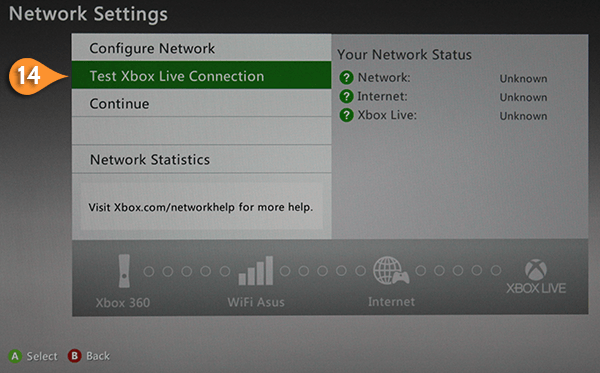

14. After successful test select Continue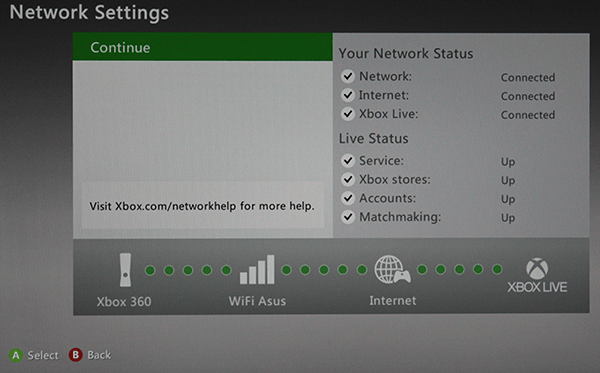
15. Now we need to change console region. Go to “Console Settings” (15)
16. Go to “Language and Locale” (16)
17. Choose “Locale” (17)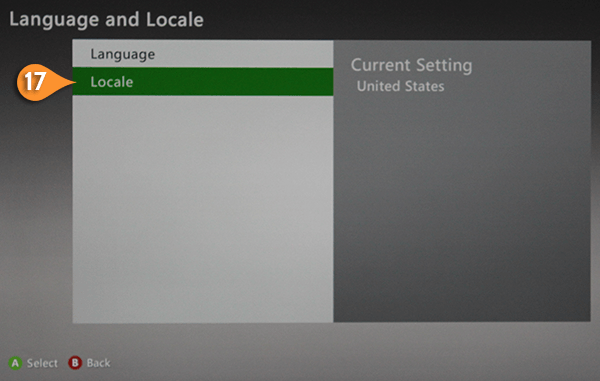

18. Choose “United States” (18).
You are all done, there is only one thing left to do – Restart your console before using the Smart DNS on XBOX 360.