

Update your original IP address in our data base before using Smart DNS.
After updating your IP, the final step is to configure the DNS server settings on your Android device. Follow these steps:
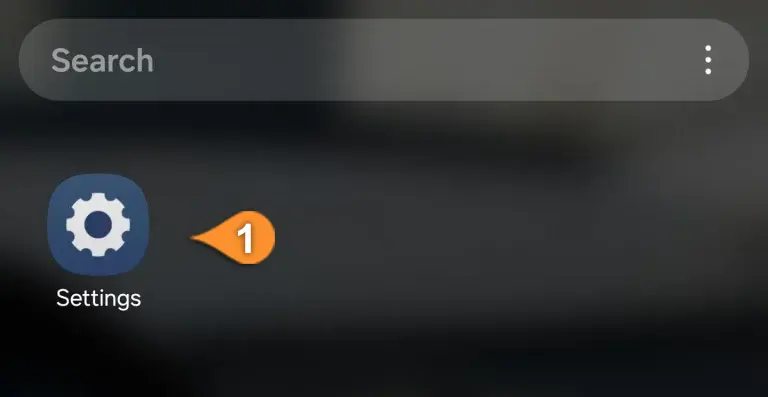
1. Navigate to the Settings (Pin 1) on your device.

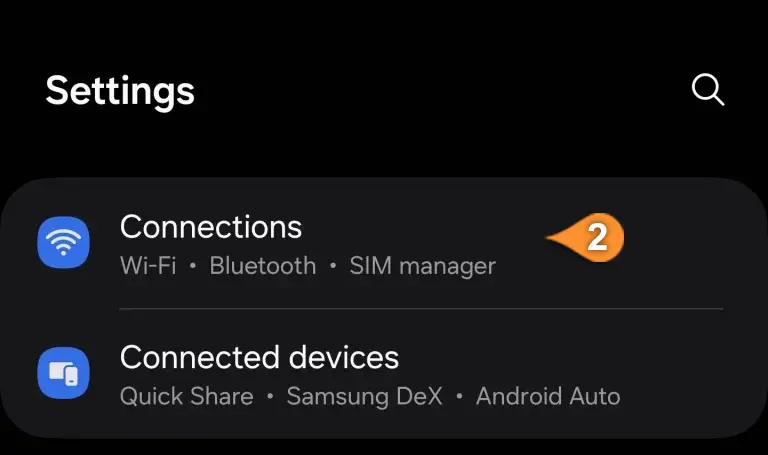
2. Tap on the Connections (Pin 2) option.

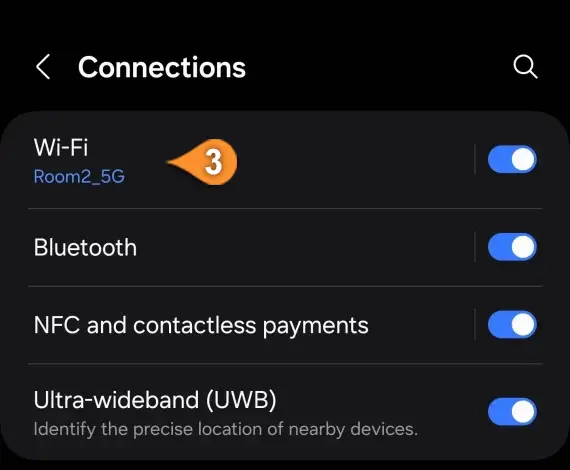
3. Choose the Wi-Fi network (Pin 3) you are currently connected to.

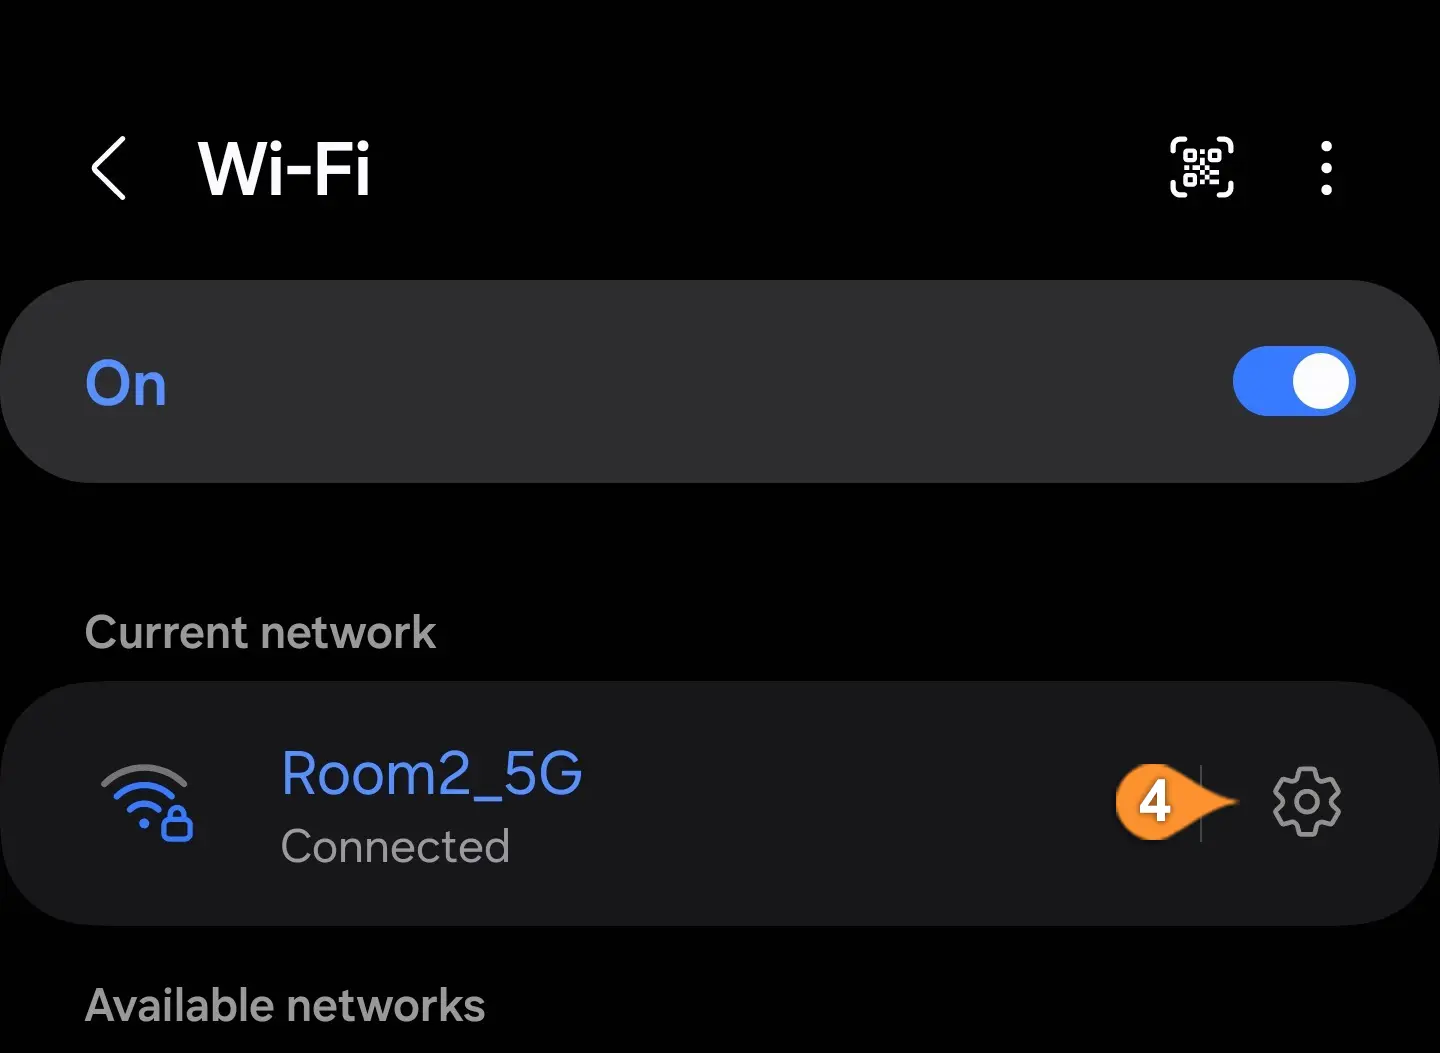
4. Tap the gear icon (Pin 4)next to your Wi-Fi network to open its settings.

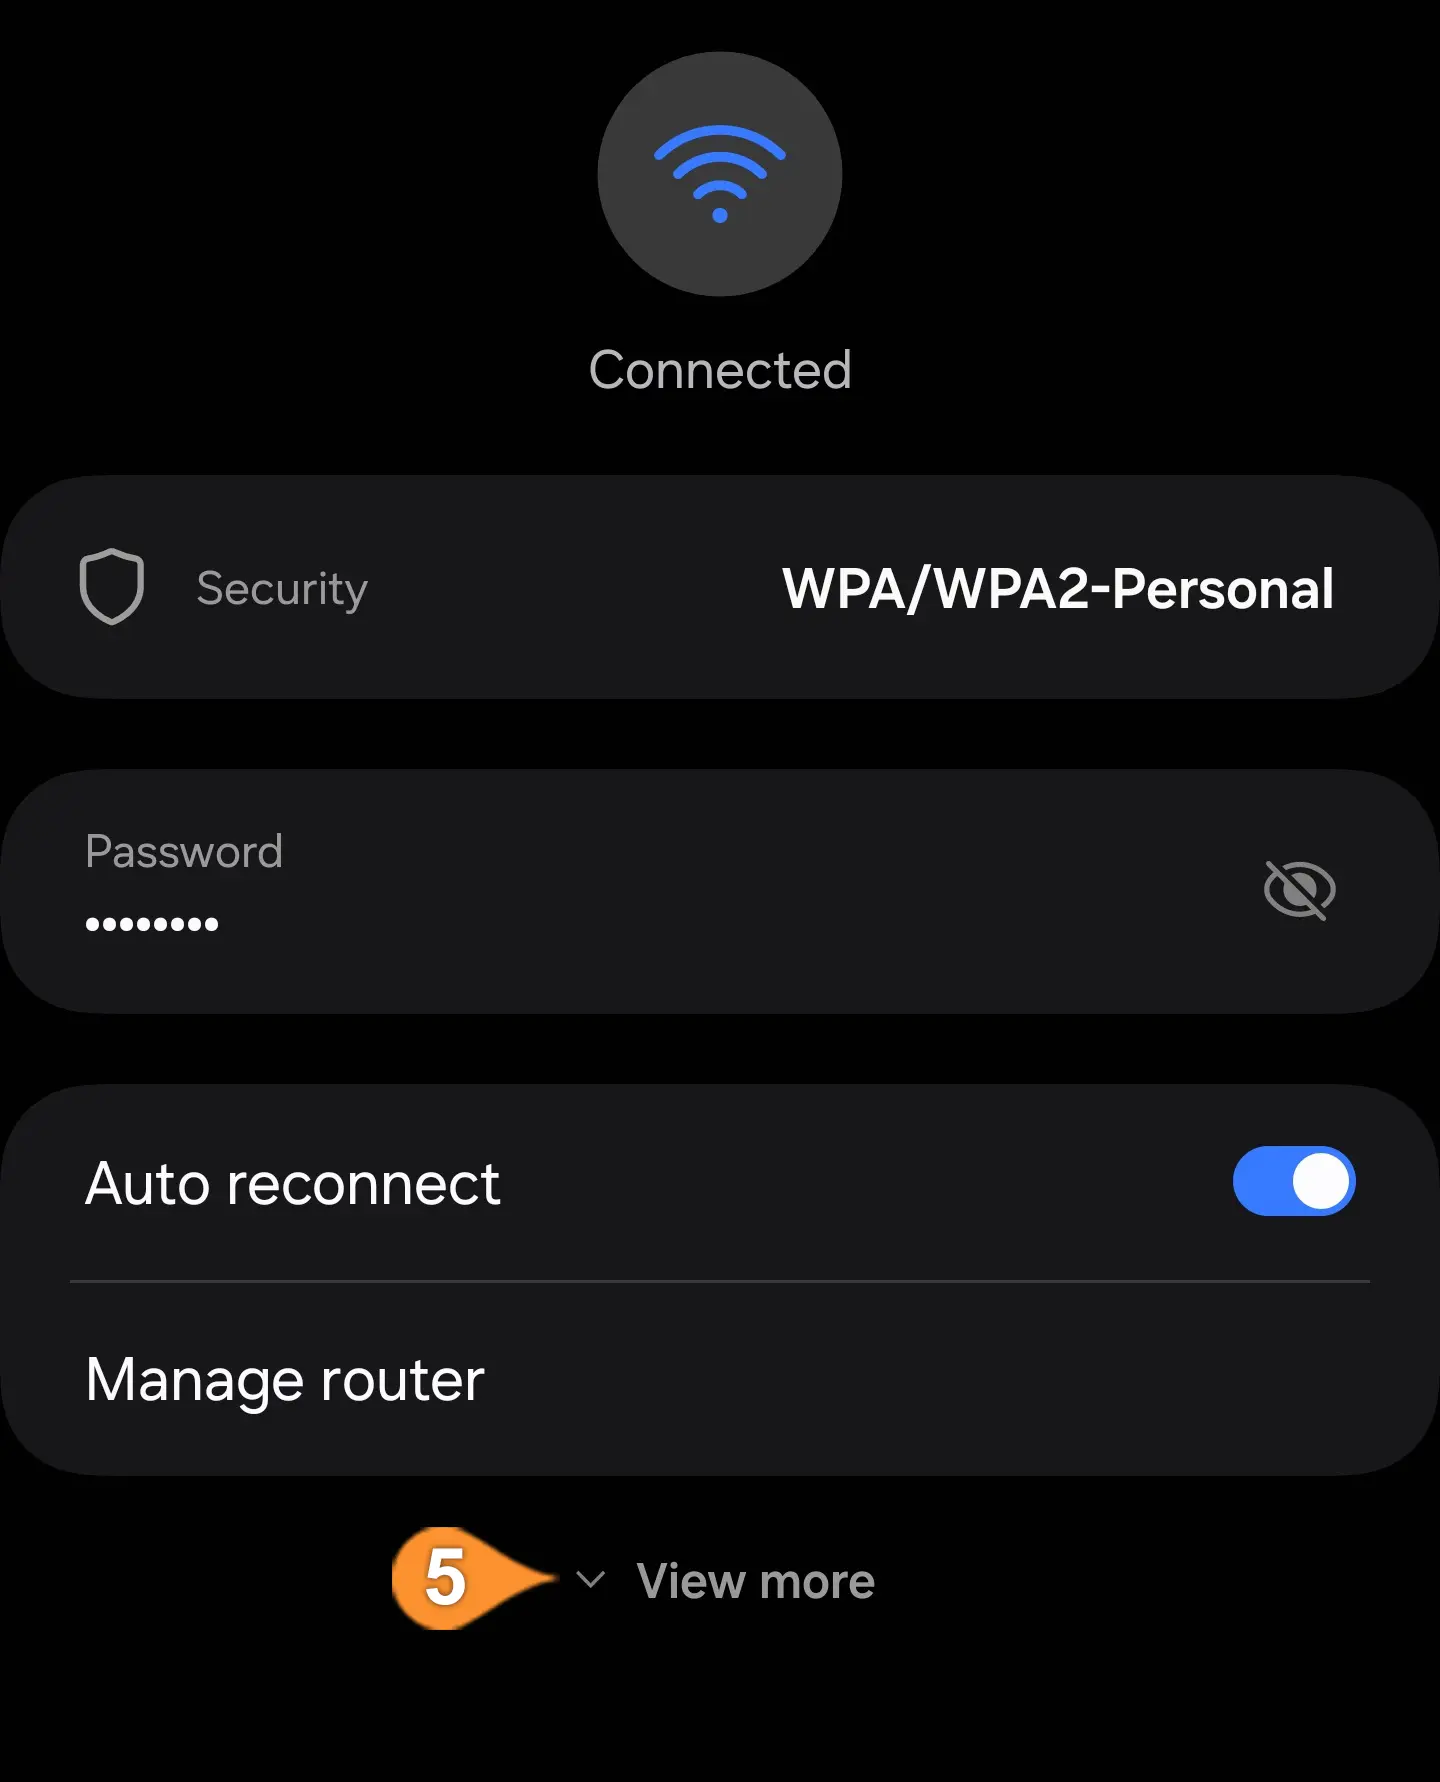
5. Scroll down and tap View More (Pin 5) to see additional settings.

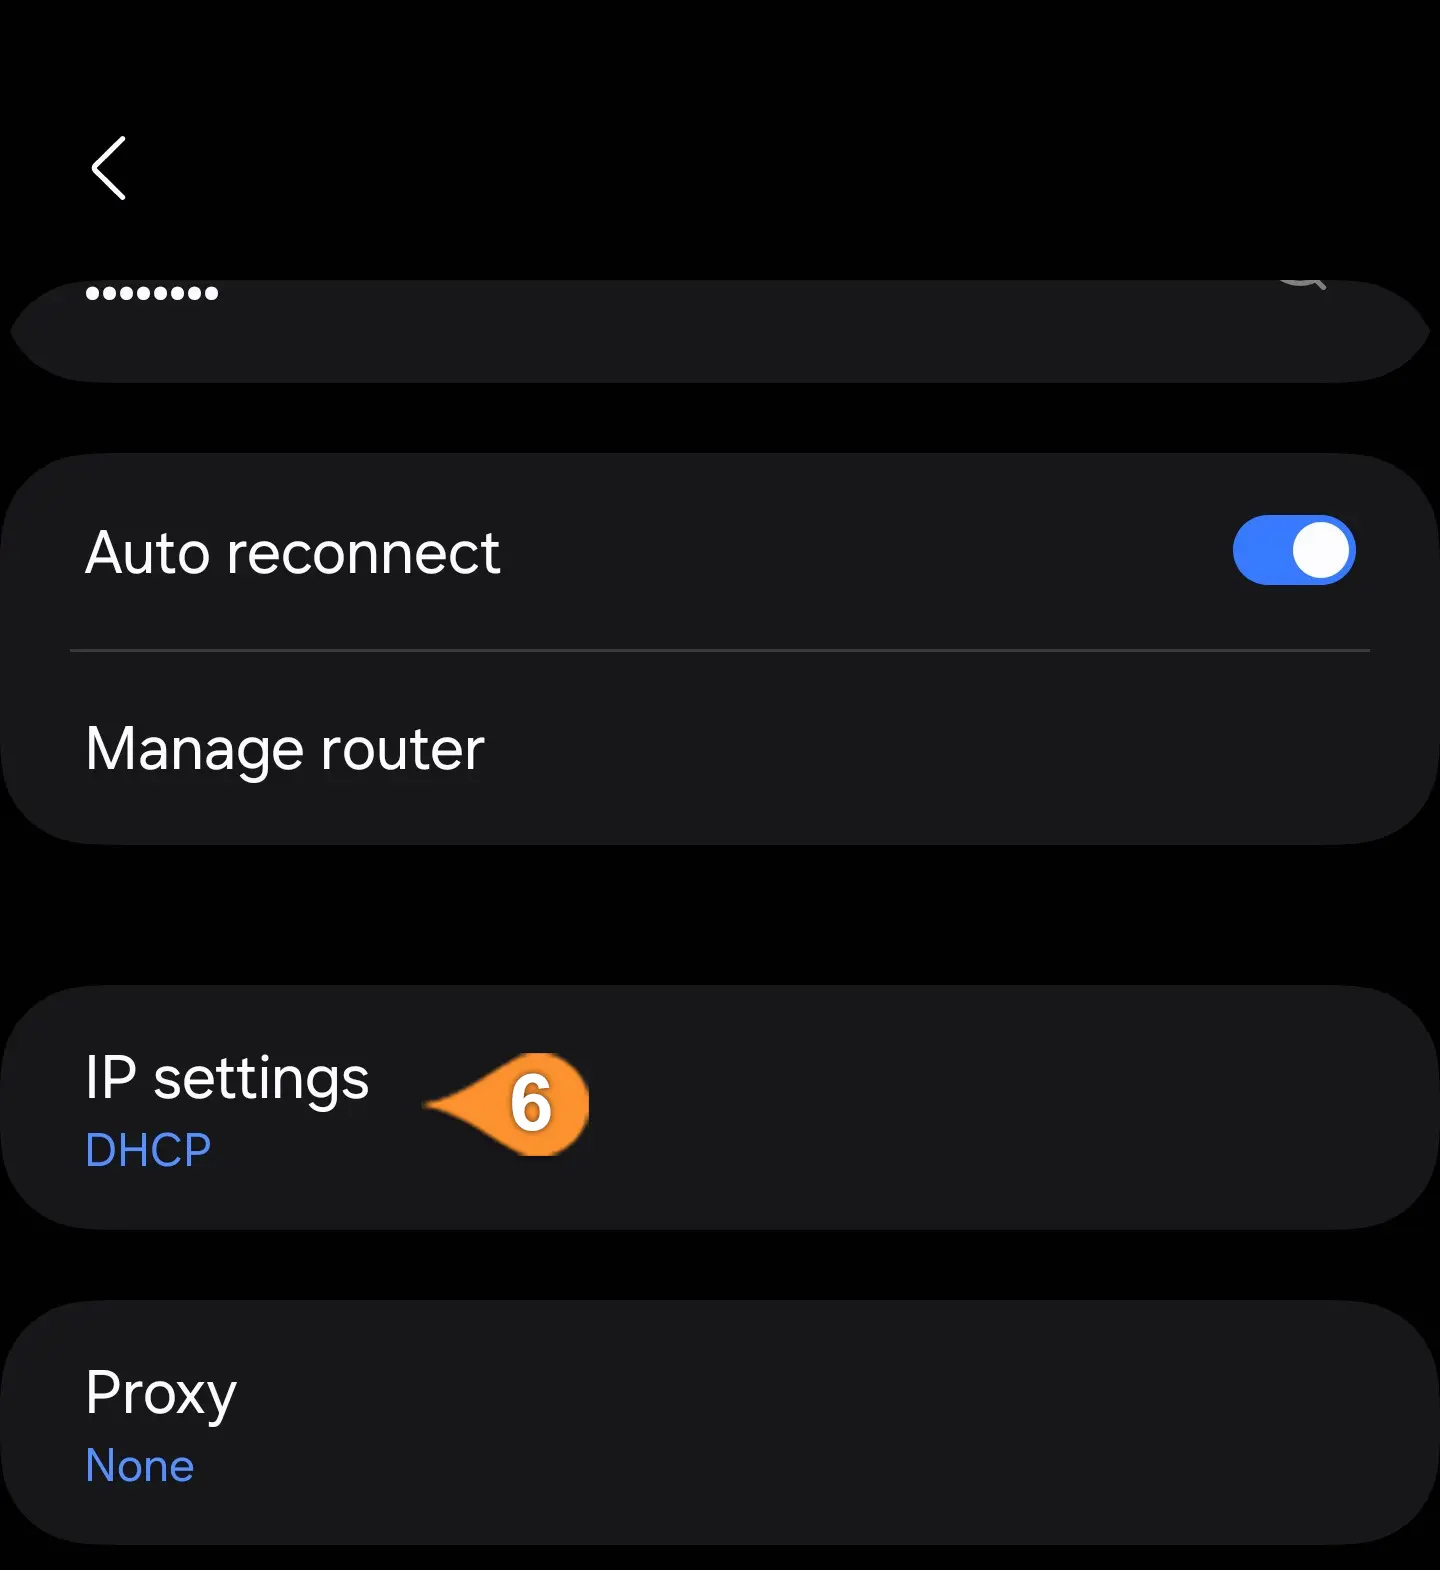
6. Locate the IP Settings section (Pin 6).

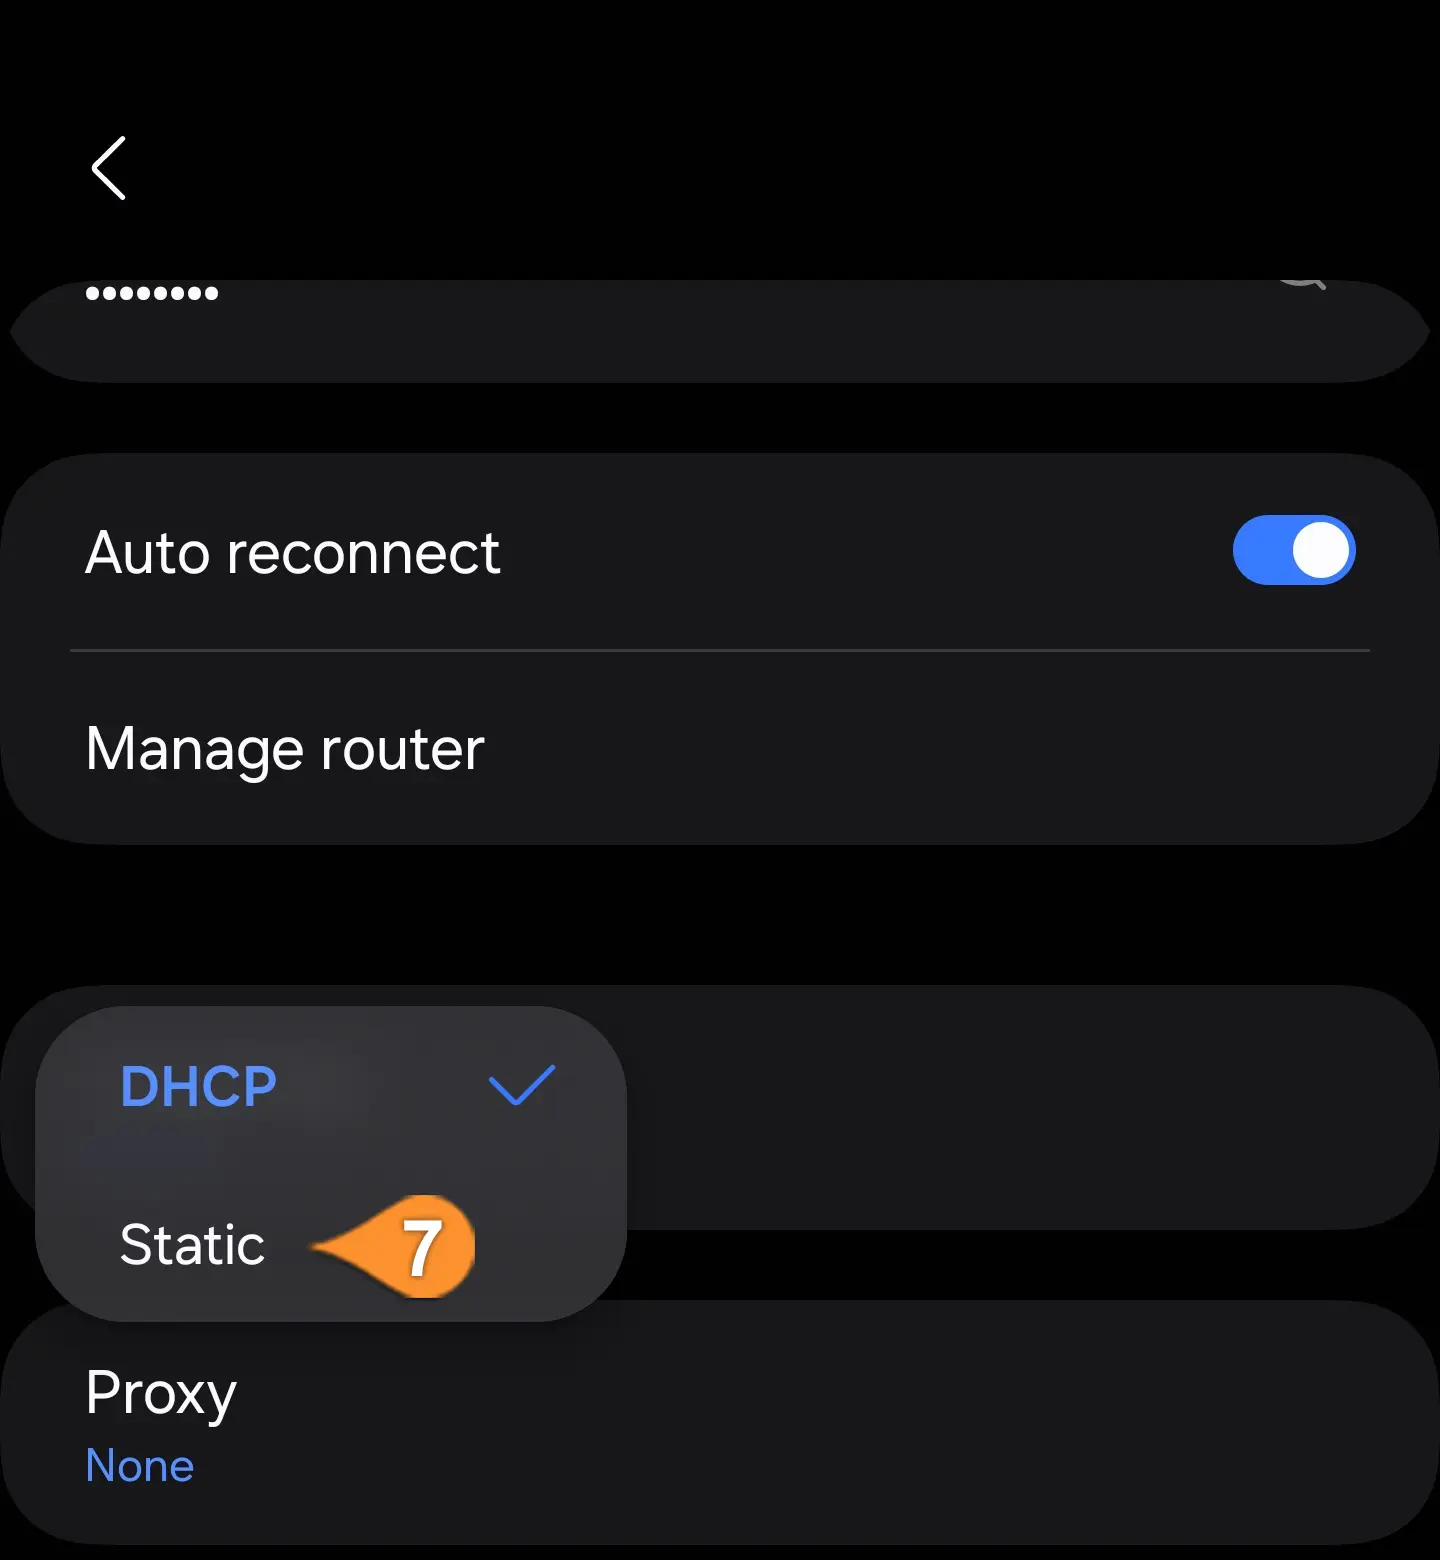
7. Change it from DHCP to Static (Pin 7).

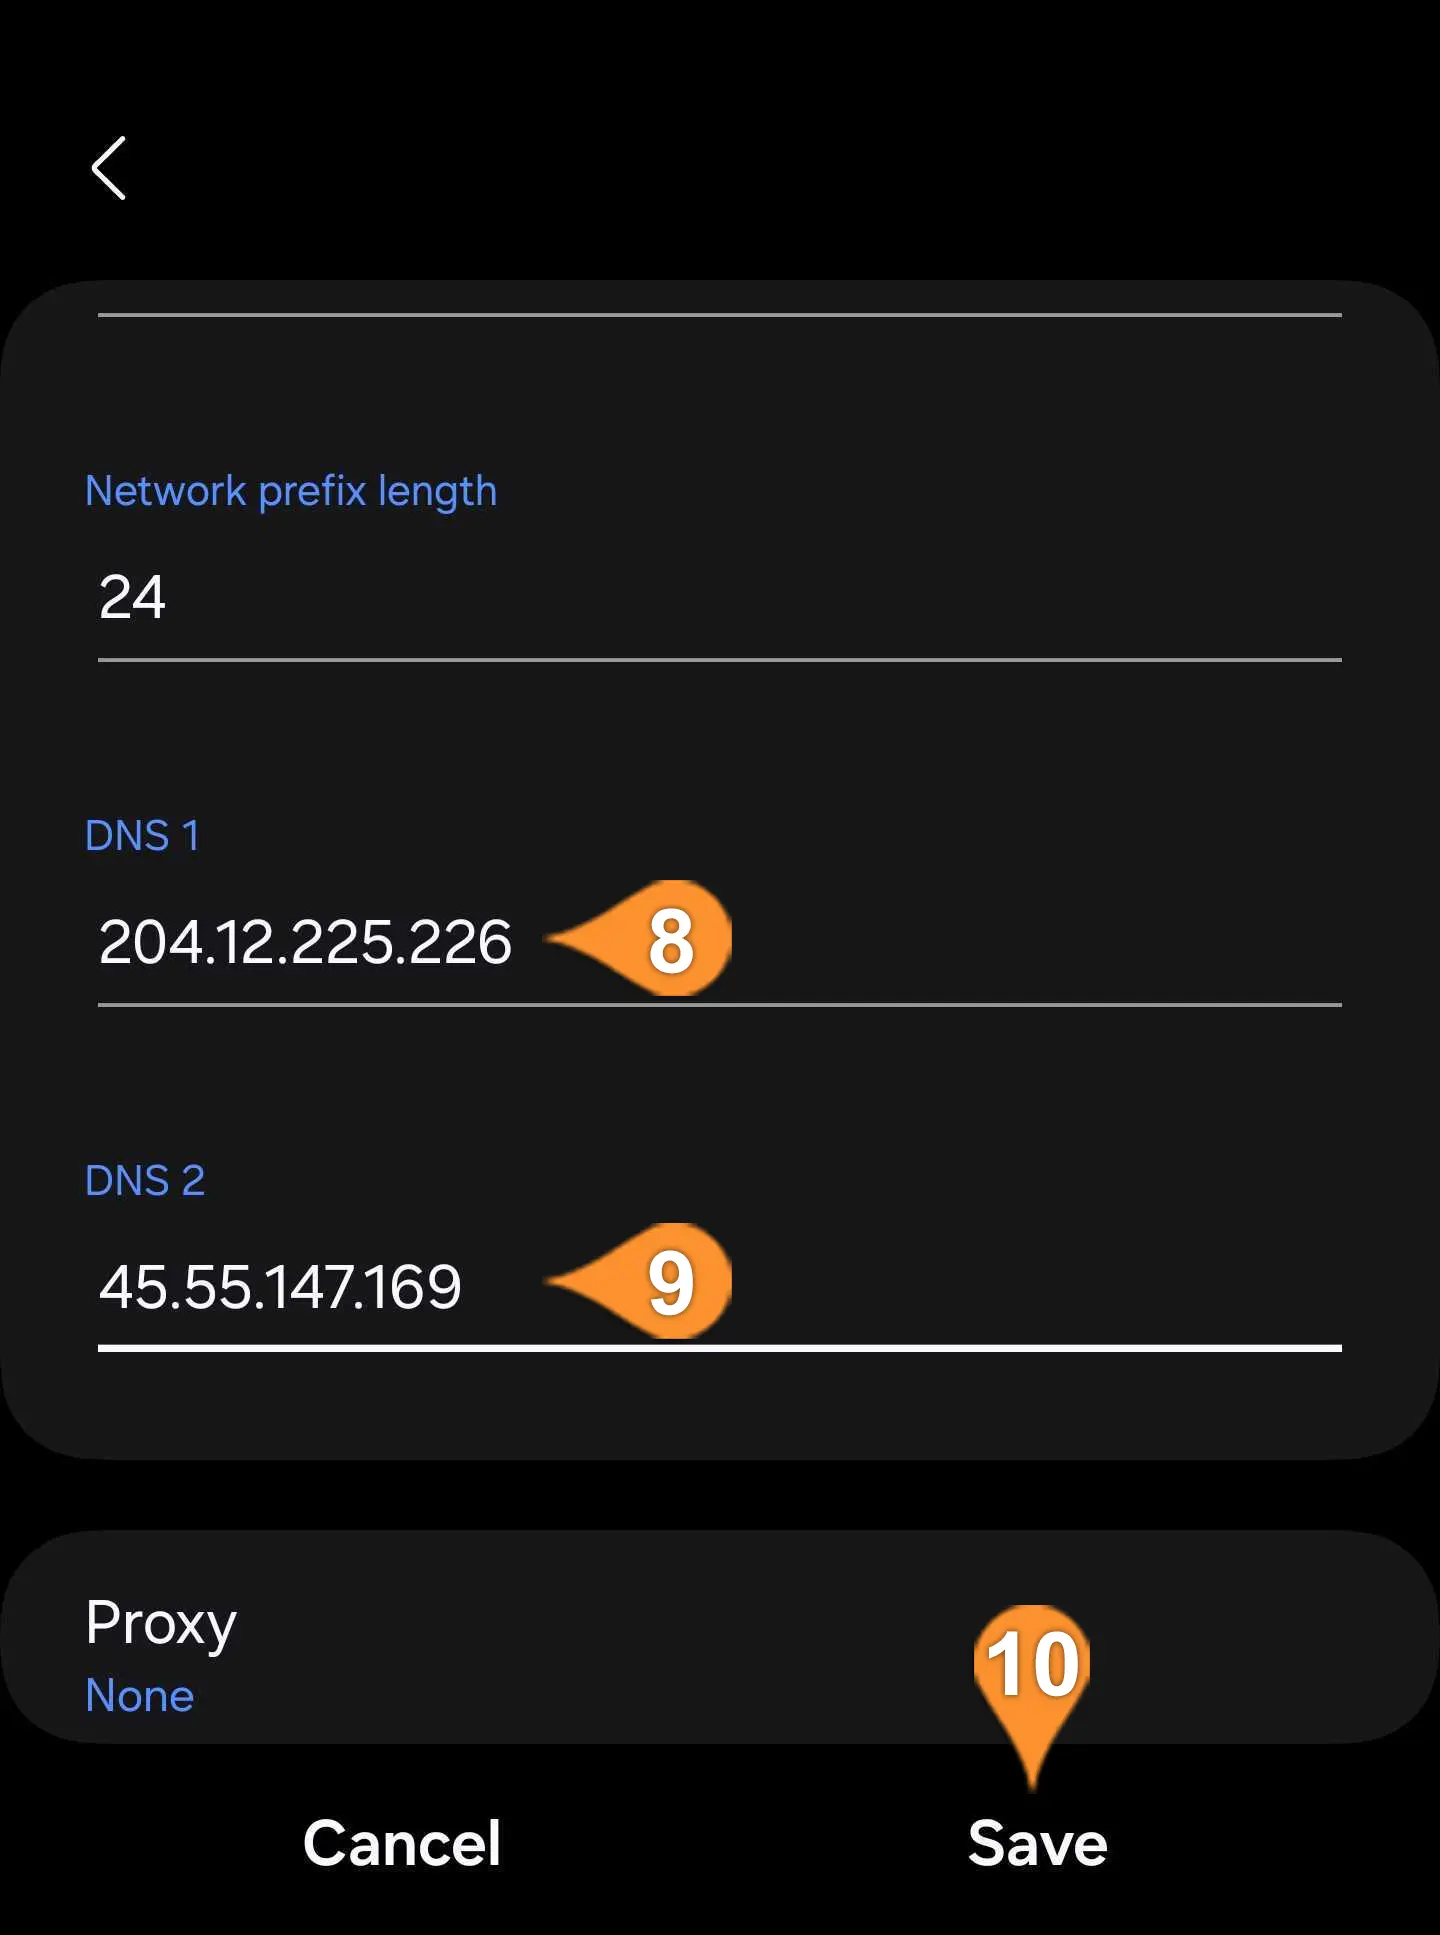
8. In the DNS 1 (Pin 8) and DNS 2 (Pin 9) fields, enter the DNS server addresses provided by HideIPVPN. You can find the server addresses here on the HideIPVPN website. After entering the DNS server addresses, tap the Save button (Pin 10).

You’re all set! Explore the sites and services now unlocked with the SmartDNS service.