

Welcome to HideIPVPN. This tutorial will guide how to setup OpenVPN connection using you DD-WRT router.
Important: We presume that you already flashed your router with DD-WRT firmware and your DD-WRT router local IP address is 192.168.1.1 and your first router has different LAN subnet, for example 192.168.0.1. When you connect to this router via wi-fi you have internet, we also presume that you have already tested VPN on your PC/Mac to ensure that your network configuration and ISP allow OpenVPN connection.
Important: OpenVPN can NOT be used concurrently with PPPoE or Static IP if you use DD-WRT flashed router as main router. We recommend you to use DD-WRT flashed router as the second one.
Connect to the router using either an Ethernet cable, or by joining the wireless network ‘dd-wrt’. Open a web browser, and load the following address: http://192.168.1.1 Note, first set your network connection to obtain IP address automatically if you connect to your router via Ethernet.
Configure your DD-WRT router to share your regular internet connection.
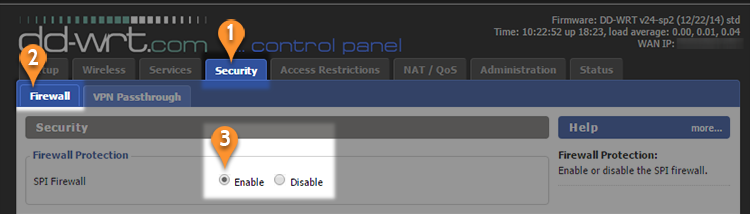
1. Go to Security (1) and select Firewall (2). Make sure SPI Firewall is enabled (3).

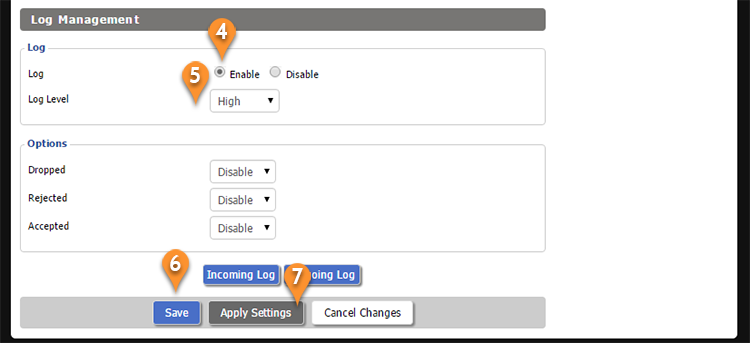
2. Below this page you need to enable Log (4) and set Log Level: High (5). Once you’re done click on Save (6), then Apply Settings (7).

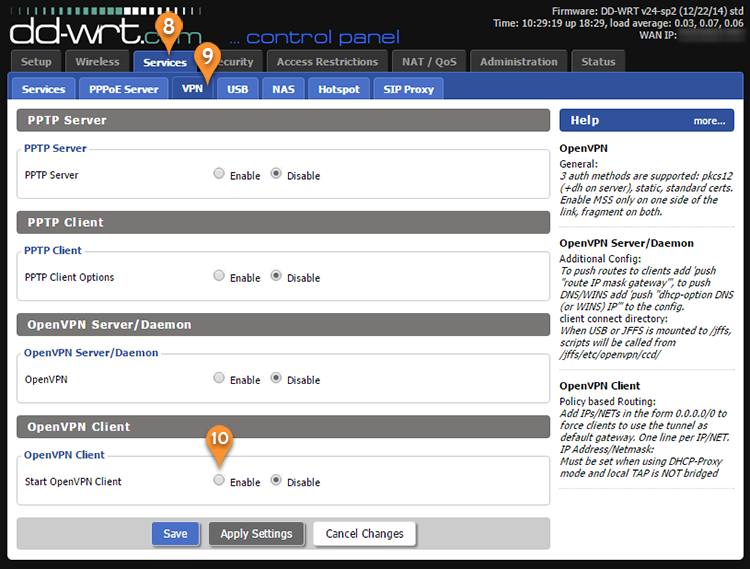
3. Go to Services (8), select VPN tab (9) and enable OpenVPN Client (10).

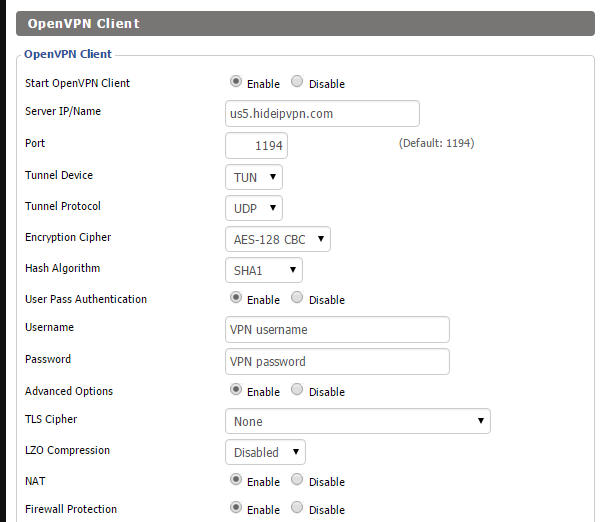
4. Setup the client as presented below:
Server IP/Name: HideIPVPN server or IP (for example us5.hideipvpn.com)
Port: 1194 ( or one of the following – 443, 992, 2460, 3389, 5005, 5555 )
Tunnel Device: TUN
Tunnel Porotocol: UDP
Encryption Cypher: AES-128-CBC
Hash Algorithm: SHA1
User Pass Authentication: Enable
Advanced options: Enable
TLS Cipher: None
LZO Compression: Disabled
Nat: Enable
Firewall Protection: Enable

5. Download OpenVPN configs from Client Area


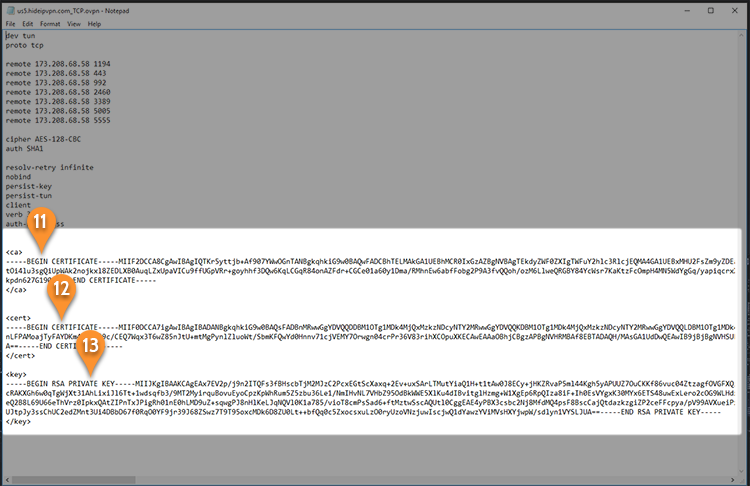
6. Uzip the archive file. Choose the .ovpn file of the server you need to connect and open it with Notepad or any other text editor. In text extract these 3 certificates in order as presented in file : <Ca>(11) , <Cert> (12), <Key> (13)

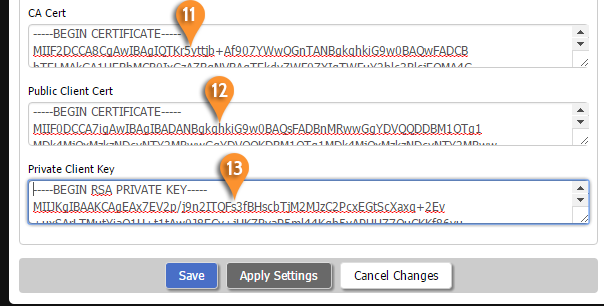
7. Copy/paste this info as presented below
<ca> to Ca Cert (11)
<cert> to Public Client Cert (12)
<key> to Private Client Key (13)
once you’re done click on Save then Apply Settings

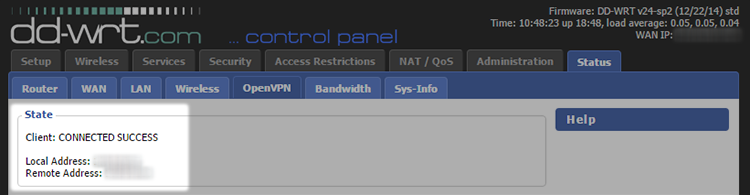
8. Go to Status tab and select OpenVPN. You should get the message “Client: CONNECTED SUCCESS”

Now you’re done! Enjoy VPN with HideIPVPN!