Welcome to HideIPVPN. Here you will find how to setup SSTP VPN on Windows 10.
Important:For an easier and faster connection we recommend you to use our free HideIPVPN software. Also check how to setup an use our VPN and Smart DNS software for Windows. But if you want to setup it manually, just follow the instructions below.
Note:Before start, you need to have an active VPN account, if you do not have one follow the link –
Get FREE VPN trial account!
Setup SSTP VPN on Windows 10
1. Find on your taskbar “Action Center” button and press on it (1). Then at the bottom click on “VPN” (2).


2. In settings window press on “Add a VPN connection” (3).


3. Now you have to set up your SSTP VPN connection. Here are the settings:
– VPN provider – Windows (built-in) (4)
– Connection – you must give a name to this connection, for example HideIPVPN SSTP. (5)
– Server name or address – type server name you want to connect. For example uk1.sstpcon.com (6). You can also find available servers under your package in Client Area.
– VPN type – choose Secure Socket Tunneling Protocol (SSTP) (7)
– Type of sign-in info – choose User name and password (8)
– Then type your VPN username (9) and Password (10)
– Check all selected data once again and press “Save” (11)


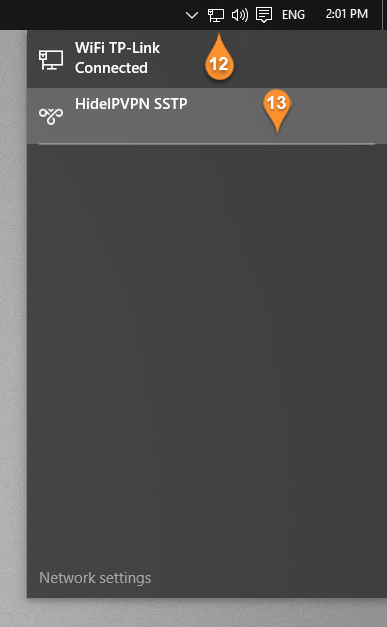
4. Now every time when you’ll need to connect just press on network button on your taskbar (12) and Select HideIPVPN SSTP connection (13).

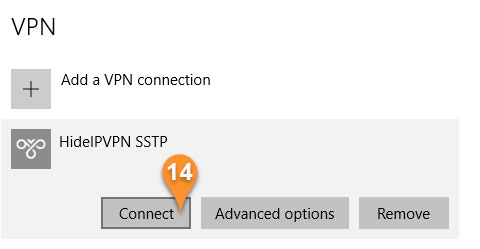
5. In settings window just press Connect (14)

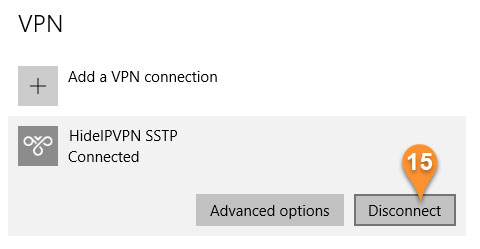
6. Or Disconnect (15).
Now you’re done. Enjoy SSTP VPN on Windows 10 with HideIPVPN.