Update your original IP address in our data base before using Smart DNS.
Now, that you IP is updated there is only one thing left to do. You need to change numbers of DNS servers on your iOS device.
Setting up HideIPVPN SmartDNS service on iPhone or iPod (iOS) is very simple.
1. Go to “Settings”.
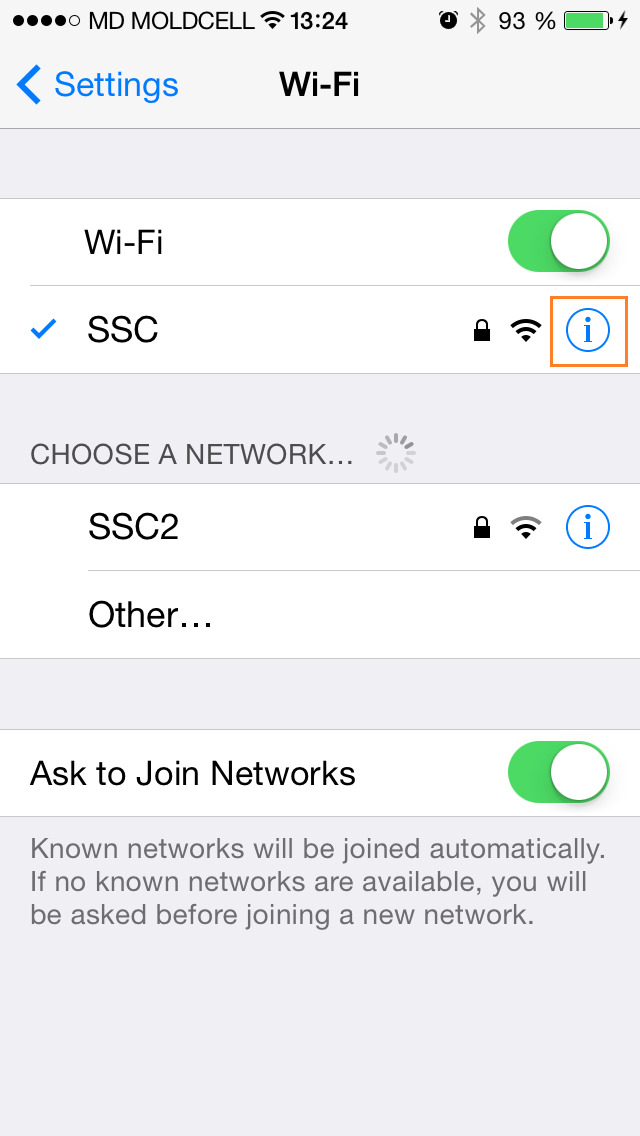
2. Select your active Wi-Fi connection and click on “i” button.
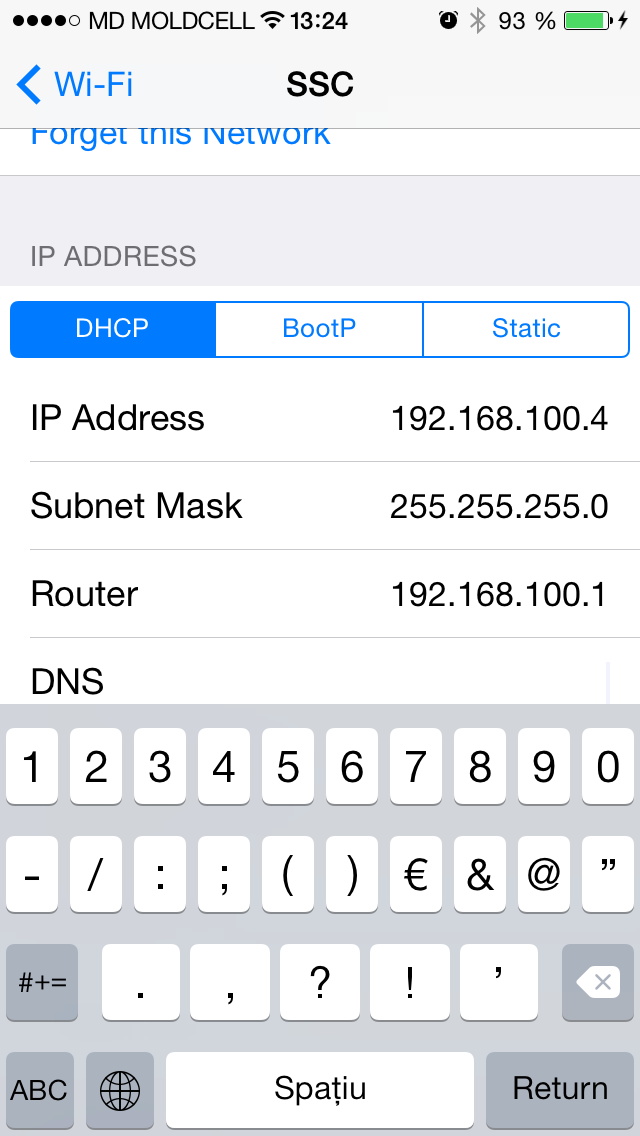
3. Delete old DNS servers from DNS field.
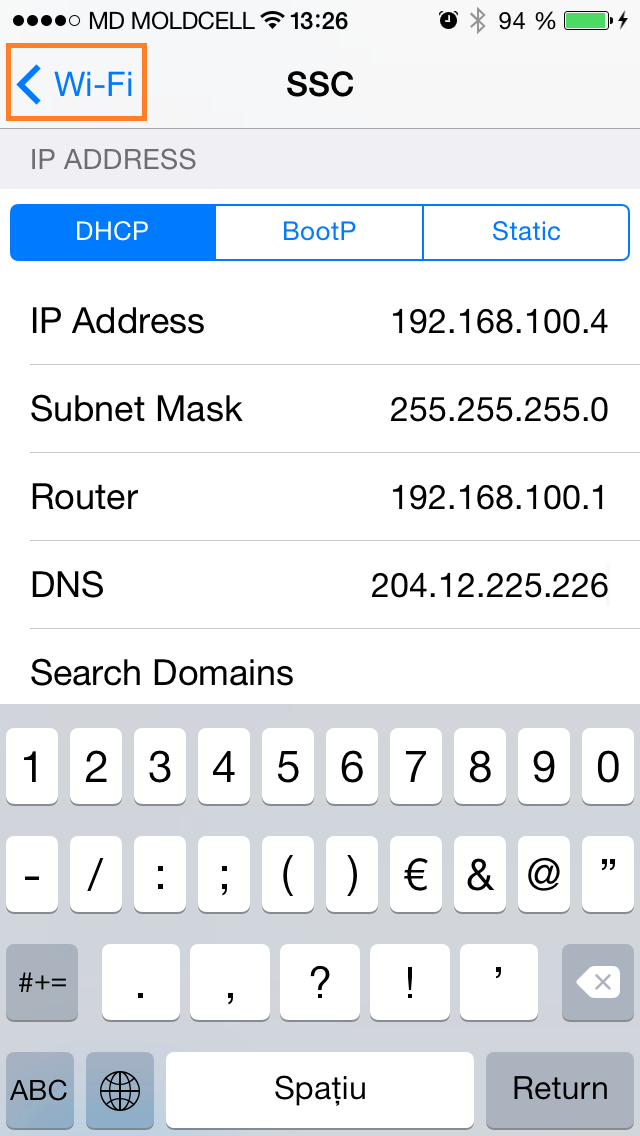
4. Change address of DNS server, click (back) Wi-Fi, to save your change. Click here to check HideIPVPN DNS server addresses.
To find out what sites and services are unlocked via SmartDNS, follow the link.