Welcome to HideIPVPN! This tutorial will guide you through installation process of Mac OS X Yosemite VPN & Smart DNS software.
1. First you need to download installation package. You can download it from here.
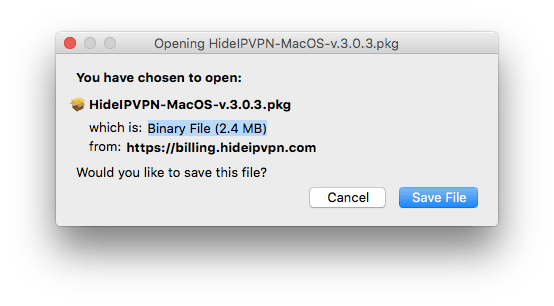
2. In opened window click Save File

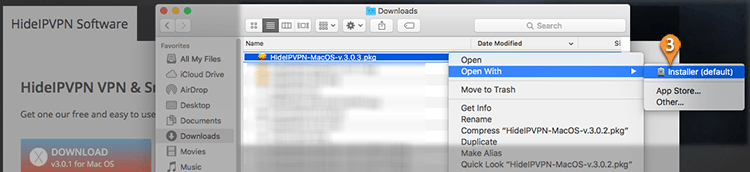
3. Once download has finished, go to Finder. In Downloads look for file HideIPVPN-MacOS-v.3.0.3.pkg. Then press right click, go to Open With and select Installer (default) (3)

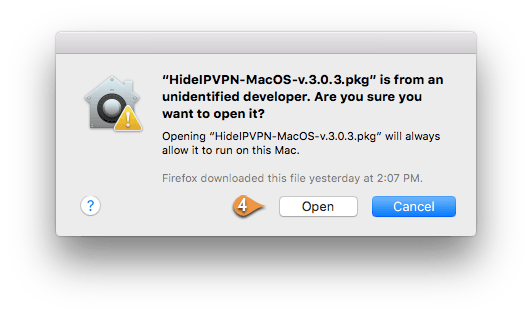
4. Because our app is not present in Apple app store, there will appear a window as it is shown bellow. Press Open (4)

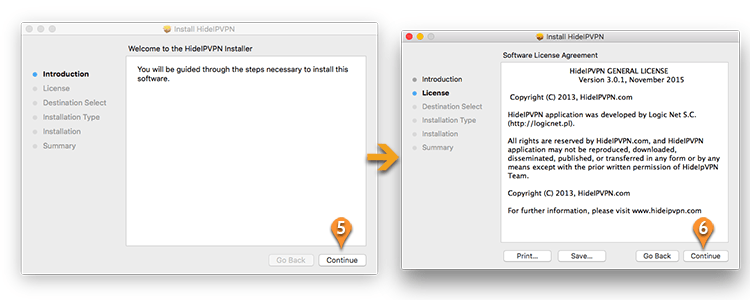
5. Once installation starts press Continue (5). Then please read License Agreement and press Continue (6).

6. Press on Agree (7). Then select destination and press Continue (8).
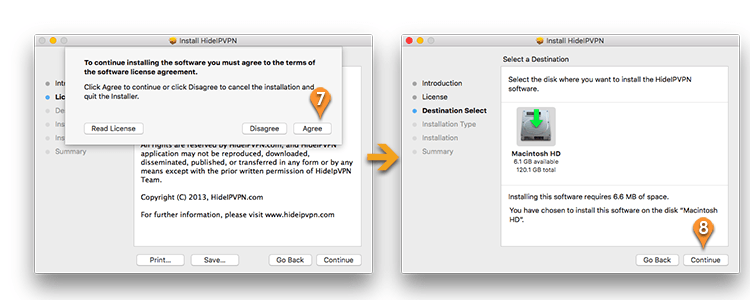
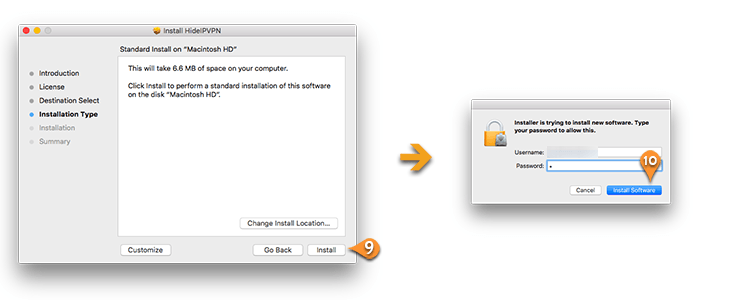
7. Press Install (9). To start installation, please type your Mac username and password, then press Install Software (10)
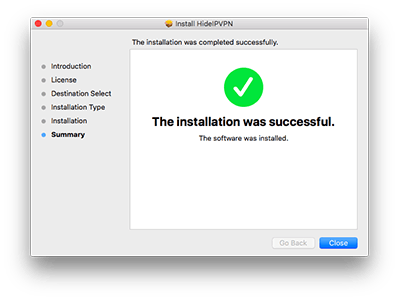
8. Once the installation is finished press Close.

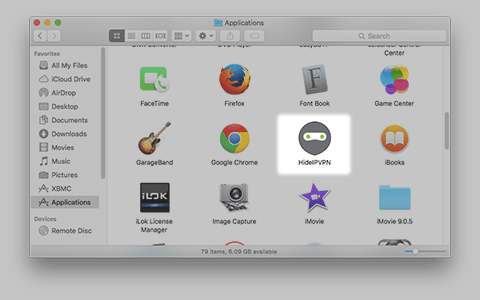
9. Go to Applications, find HideIPVPN and open it.

10. When app opens, start with selecting service you want to use VPN or Smart DNS. If you want to use Smart DNS then jump to point #16 of this tutorial. If you selected VPN, please introduce your VPN username (11) and password (12). You can find them in the emails from us. Then press LOGIN (13)

11. You’ll have to enter once again your Mac username and password. Then press OK.
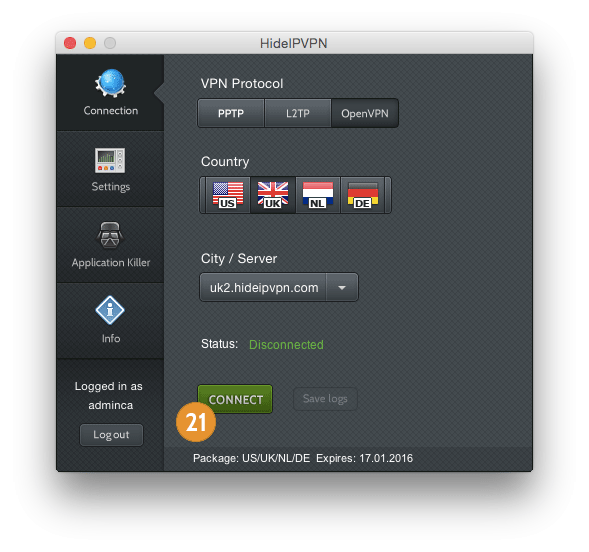
12. Once Loged In, you will have the opportunity to select VPN protocol, Country and Server which you want to connect to. Make your selection and press CONNECT (14)


13. After connecting, application will change status to Connected. To end connection simply press DISCONNECT.
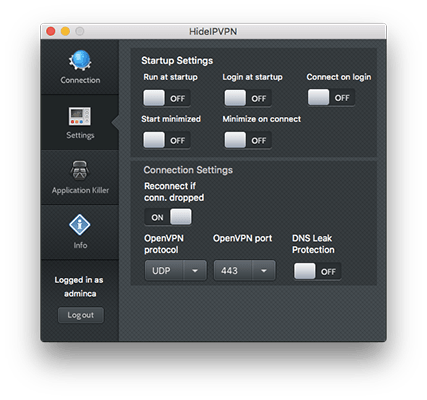
14. Don’t forget to choose additional options in Settings, like Run at startup or Start minimized, Reconnect if connection dropped. Also now you can choose OpenVPN protocol and port for connection. And of course DNS Leak Protection.
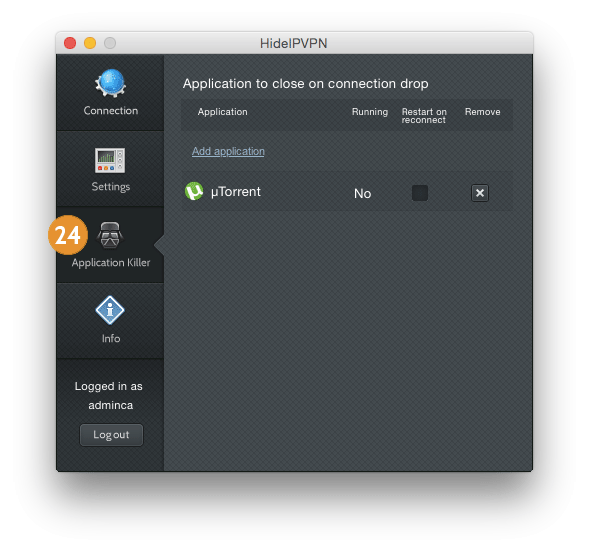
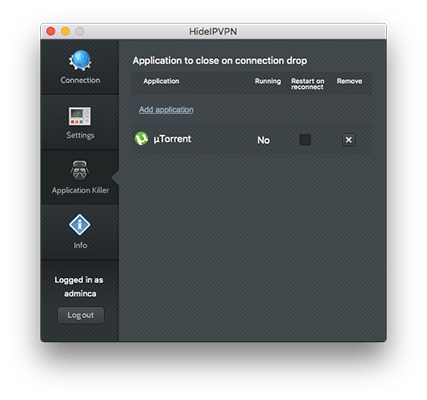
15. In Application Killer section you can setup to close selected apps when you loose VPN connection.
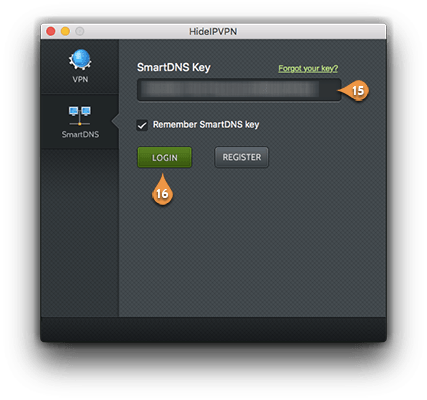
16. For connecting to Smart DNS, you need to copy your Smart DNS key to app. To find the key, go to our website, sign in to Client Area, click on your package and find Smart Key. Paste Smart Key in HideIPVPN app (15) and press LOGIN (16).
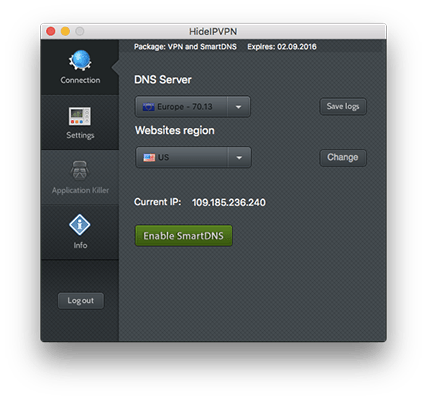
17. Once you are logged in, select DNS Server you want to use and choose Website region. Press Enable Smart DNS (for better result choose DNS closer to your physical location).
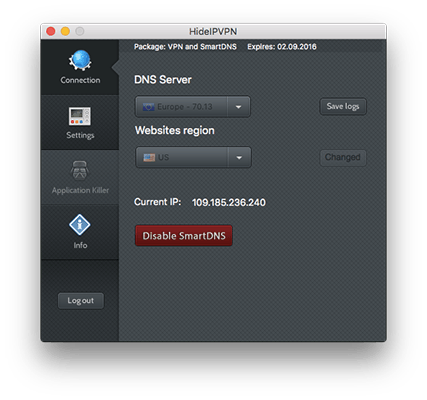
18. When finished just press Disable Smart DNS
Now you’re done! Enjoy VPN & Smart DNS with HideIPVPN