HowTo: Windows Vista L2TP/IPSec VPN Setup Tutorial
Last updated on March 19th, 2010 in Setup
Setting up HideIPVPN access under Windows Vista is simple. The following instructions go step-by-step through the creation process of a L2TP/IPSec VPN connection.
Open Network Connections
First, go to the Start Menu and select Connect To.

Setup a Connection
Then click Set up a connection or network.
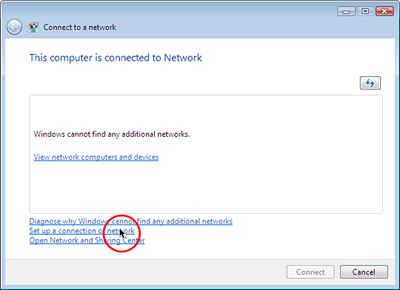

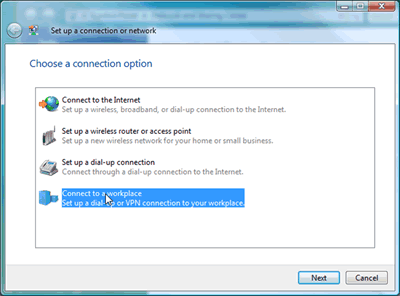
The Set up a connection or a network window will now be displayed. Click on Connect to a workplace. Then click Next in the lower right hand section of the window.
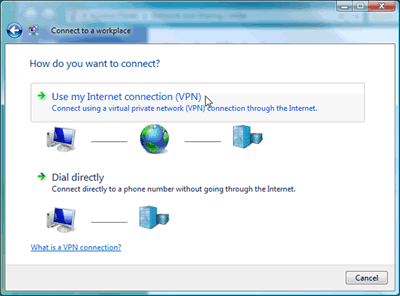
How Do You Want To Connect?
Next, you will be asked how you want to connect. Click Use my Internet connection (VPN).
That will bring up the following screen in which you can type in the IP address of the VPN and what you want to name the connection.
Set Up The Internet Address
On this screen, type the name of the IP address of a HideIpVPN server. You have to check the email you have received when you have paid for the HideIpVPN account. You will find there the available servers.
Then click the Next button.
Important! If you are located in a country where our site is blocked (like China) make sure your read the following post: Special VPN Settings For Chinese Users.
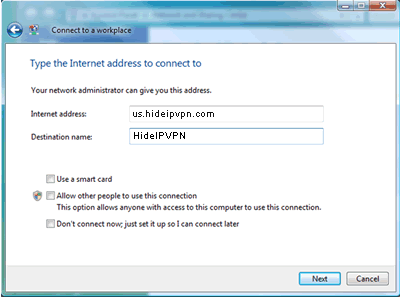
In the Destination name: field, type in what you want to call the network. A good name for this is HideIPVPN. Then click Next.
Fill In Your Username and Password
Next, type in your HideIPVPN username and password. Check the Remember this password box.
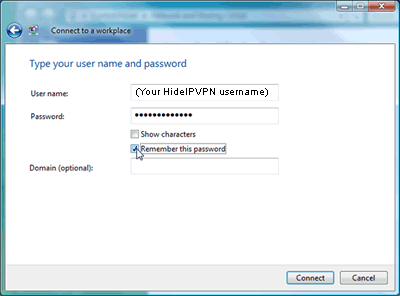
Click Connect. If you see the message You are conencted it means that you have suucesfully setup the HideIPVPN conection.
In the Connect to a network screen, you should see the HideIpVPN connection that you have just set up. Right–click on the HideIpVPN connection document, and choose Properties from the menu.
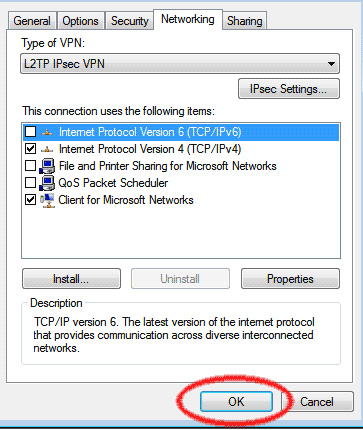
In the HideIpVPN Properties, click on the Type of VPN pop–up menu (hilighted in red) and select L2TP/IPsec.
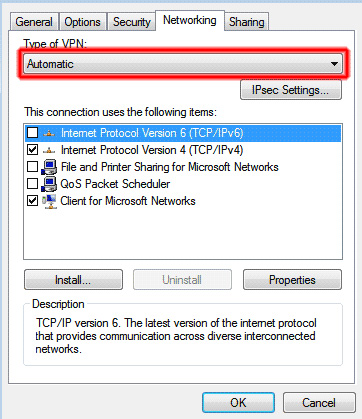
Next, click on the IPsec Settings… button (hilighted in red).
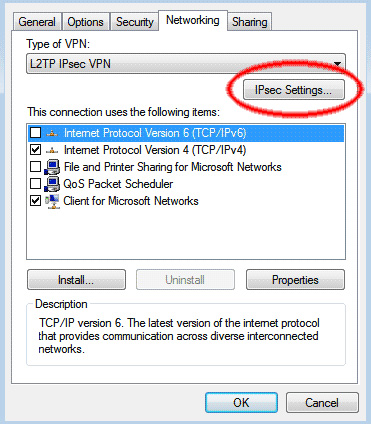
In the IPsec Settings dialog, click the radio button labelled Use preshared key for authentication (hilighted in green). Then type hideipvpn into the textbox labelled Key (hilighted in blue). Then click the OK button (hilighted in red).
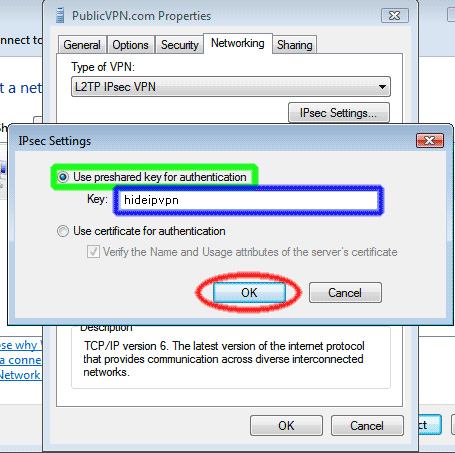
You’re finished! Click the OK button to save your settings.
Connect To HideIPVPN
When you want to connect to HideIPVPN.com, just double–click on the connection and click the Connect button. Enter your username and password (if you didn’t save it), and you’ll connect!
To disconnect from a VPN connection, right-click the icon for the connection, and then click Disconnect.
Important! If you have problems with DNS resolution please also read this post: DNS Issues On PPTP VPN Connect.
If you have problems connecting to our VPN server please take a look at our knowledge base before opening trouble ticket.