How to: Transparent DNS Proxy Test
Last updated on March 28th, 2015 in Setup
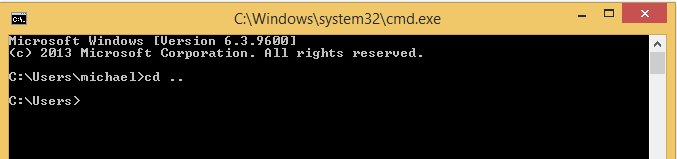
This will open a window like the image bellow :
3. In that window type:nslookup smarttest.hideipvpn.net and press Enter. You will get a reply. It should look like this, but might differ a little depending of DNS country you selected.
C:\Users\michael>cd ..
C:\Users>nslookup smarttest.hideipvpn.net
Server: unusal.antycip.co.uk
Address: 83.170.84.75
Name: smarttest.hideipvpn.net Address: 204.12.225.226
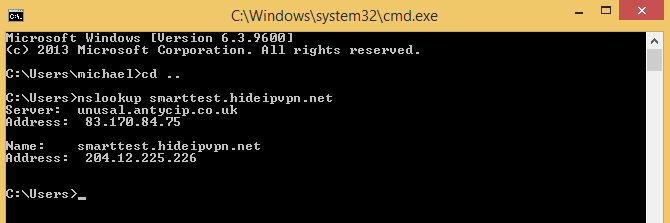
If the result next to second “Address” is 204.12.225.226 you have no problems and our DNS servers works well on your computer.
In case you have another result go to Step 4.
4. Type:nslookup smartest.hideipvpn.net 78.129.226.64 and press Enter.
You will get a result that will look like this:
C:\Users\michael>cd ..
C:\Users>nslookup smarttest.hideipvpn.net 78.129.226.64
Server: UnKnown Address: 78.129.226.64
Name: smarttest.hideipvpn.net
Address: 204.12.225.226
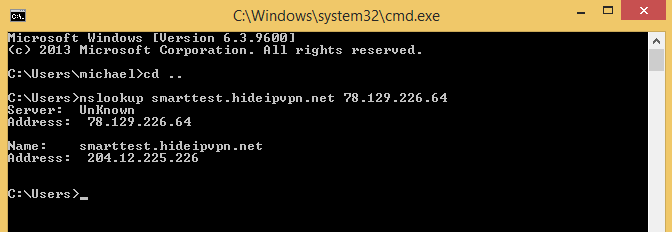
If you see in your result at “Address:” another IP address than 204.12.225.226 then your Internet Service Provider is doing Transparent DNS Proxy. In this case, the only solution is to follow our tutorial for bypassing Transparent DNS Proxy with a DD-WRT router.