How to setup OpenVPN on Chrome OS
Last updated on March 2nd, 2017 in Setup
Today tutorial for a bit more experienced users. If you own a Chromebook you might want to know how you can use our VPN service on your device. With that in mind we give you “How to setup OpenVPN on Chrome OS” tutorial.
Connecting via OpenVPN protocol on ChromiumOS/Google Chrome is recommended for advanced users only. Reason for such recommendation is, because Chrome OS currently does not accept common certificates and keys. That means you can not connect using the ChromeOS GUI, like you would do with L2TP protocol.
First you need to get into the console mode. On some ChromeOS systems/devices this requires to enable the developer mode first. How this is done differs from device to device, here’s a list with links to instructions.
General information on how to access console/terminal and other related info can be found here.
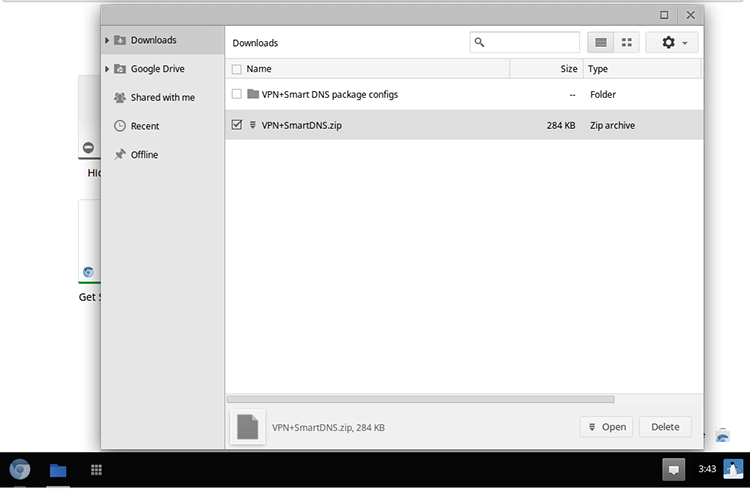
1. First download the configuration files, unzip them and place in the desired folder
2. Now you need to enter the console terminal. You have 2 options to get into the console mode. Which one you use, does not matter.
Option 1: Console mode:
To get into the console mode, try either
CTRL+ALT+F2 or
CTRL+ALT+RIGHTARROW
You should now be asked for a username and password.
If you didn’t change any usernames/passwords of the system before, try:
User: chronos
Password: facepunch
Other possible usernames and passwords: chronos, chroneos, chrome, chromeos, facepunch
Option 2: Terminal mode:
To create a new terminal mode window, hit
CTRL+ALT+T
You should see this:
crosh>
Here, enter shell
You’re now logged in with a restricted user account.

The next step is to get root access.
Enter: “sudo su”
You should now be asked to select a root password. Make sure to write it down somewhere, in case you forget it!
If you’re asked to type a root password try : facepunch
![]()
Now is the time to connect to the VPN.
You’ll need the *.ovpn config file of the server you’d like to connect to.
Re-check now folder where you stored the .ovpn files, we stored them in “Downloads” folder
To leave the console mode, hit CTRL+ALT+F1 or CTRL+ALT+LEFTARROW
to leave the terminal mode, hit ALT+TAB
Now you can simply connect to the VPN within console mode by running:
“openvpn /full/path/to/configfilename.ovpn”
Next you’ll be prompted to type your VPN username and VPN password

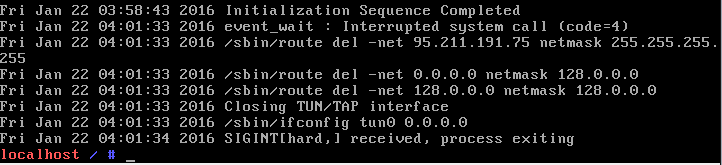
Once the client shows you something like
“Sun Aug 24 01:28:13 2014 Initialization Sequence Completed”,
that means you are successfully connected and you can go back to your normal desktop.
To leave the console mode, hit CTRL+ALT+F1 or CTRL+ALT+LEFTARROW to leave the terminal mode, hit ALT+TAB
To confirm that you are successfully connected, you could browse to http://www.bestiptest.com/ and verify your IP address and location
To disconnect from the VPN, go back to console mode (CTRL+ALT+F2 or CTRL+ALT+RIGHTARROW, for terminal mode just ALT+TAB ) and hit CTRL+C.
This is how you can setup and use OpenVPN on ChromeOS. If you do not have an active VPN account yet click below to get one.