How to setup IKEv2 on Windows 10
Last updated on January 24th, 2018 in Setup
Welcome to HideIPVPN. In this tutorial we will show you how easy and fast to setup IKEv2 on Windows 10. (This tutorial is compatible with Windows 8).
Important:For an easier and faster connection we recommend you to use our free HideIPVPN software. Also check how to setup an use our VPN and Smart DNS software for Windows. But if you want to setup it manually, just follow the instructions below.
Note:Before start, you need to have an active VPN account, if you do not have one follow the link –
Get FREE VPN trial account!
1. From your desktop screen, click on the Network icon which can be found at the bottom right hand corner of your screen and click on Network & Internet Settings ( in some Windows versions it could be named Network Settings).
![]()
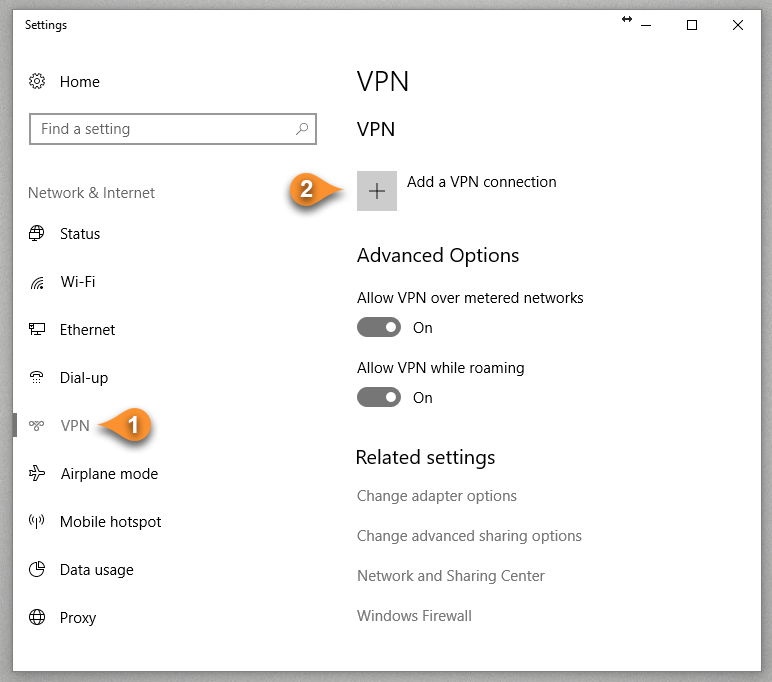
2. In the opened window navigate to VPN (pin 1) and click on Add A VPN Connection (pin 2).
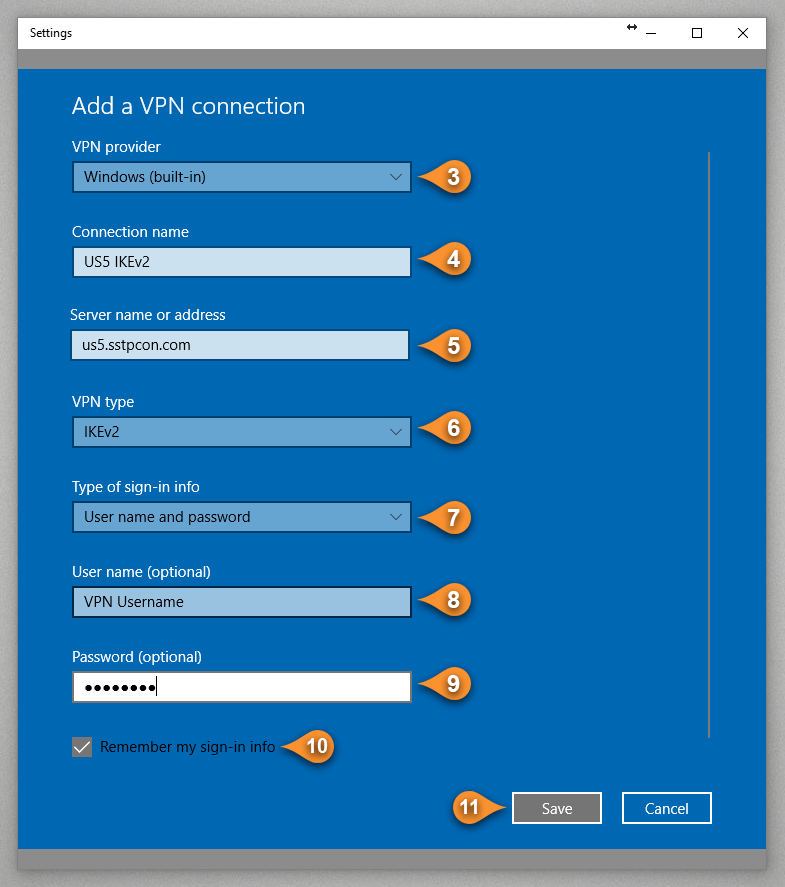
3. Now enter the VPN details as below:
– VPN provider: Windows (built-in) (pin 3)
– Connection name: US5 IKEv2 (pin 4)
– Server name or address: us5.sstpcon.com (pin 5). You can also find available servers under your package in Client Area.
– VPN type: IKEv2 (pin 6)
– Type of sign-in info : User name and password (pin 7)
– User name : Your VPN username (pin 8)
– Password : Your VPN password (pin 9)
– Select the checkbox “Remember my sign-in info” (pin 10) if you want to save you login details.
– click on Save (pin 11)
4. Once you saved your settings you should get back to VPN settings window ( same as in the 2nd point ). Scroll down and click on “Change Adapter Options” under “Related settings”.

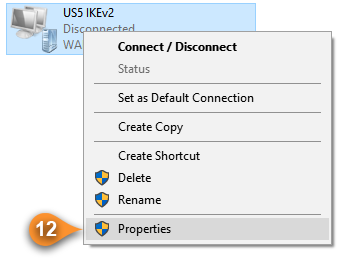
5. You should now be able to see the VPN connection that you’ve set up. i.e. US5 IKEv2. Right click on your VPN icon and select Properties (pin 12).
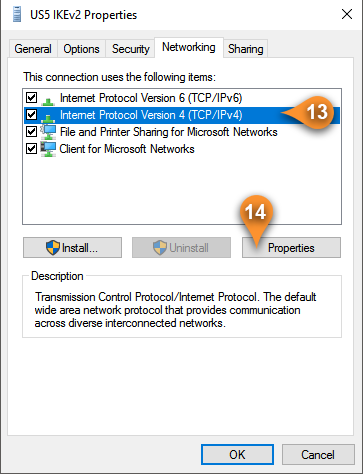
6. The properties window will be displayed. Click on the Networking tab and select Internet Protocol Version 4 (TCP/IPv4) (pin 13) if not selected. Click on Properties (pin 14).
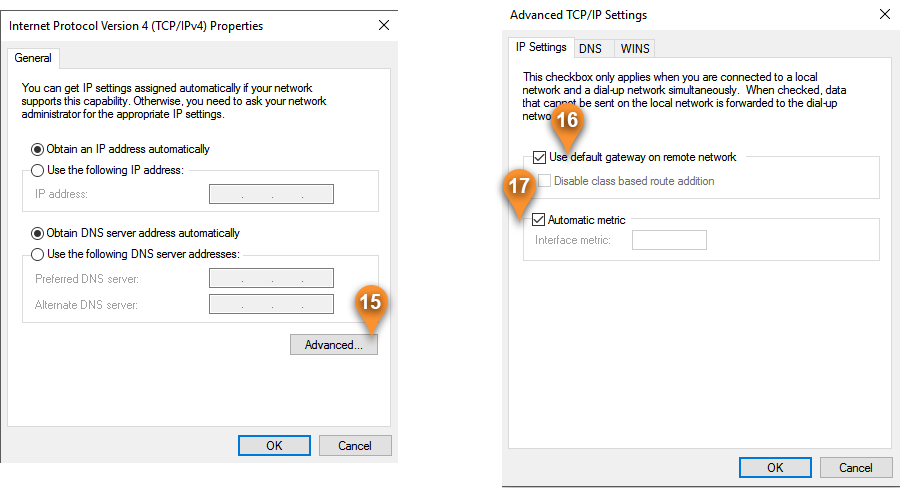
7. Leave the settings as it is and click on Advanced Settings (pin 15). Then in the IP Settings tab, check the box Use default gateway on remote network (pin 16) and Automatic metric (pin 17) and click OK .
8. Click OK again to save the settings and close the dialog box. Return back to the Network Menu and select the VPN connection that you have just created and click on Connect.
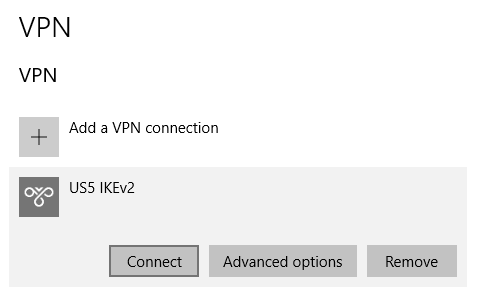
The VPN will now attempt to connect to our service and if successful, the VPN status will change to Connected.
Now you’re done! Enjoy your privacy with IKEv2 VPN on Windows 10 with HideIPVPN.