How to update user’s IP address for Smart DNS
Last updated on November 3rd, 2021 in Setup
In order to use HideIPVPN Smart DNS your IP address has to be registered/updated in our data base.
Note: There are 3 methods to update your IP address:
a. UPDATE IP button: To update your IP just press on the “UPDATE IP” button (pin 4). After updating, a message will appear – “Your IP is updated! No actions are required”.
b. Update a specific IP address: You can update your IP address or a specific one by entering it in the box, then press the “UPDATE IP” button (pin 5).
c. Update IP address by URL: You can update your IP address quickly via IP update URL. This way you do not have to log in to the “Client area”. Simply copy a link to your browser favorites and every time you load this URL your IP address will be updated (pin 6)
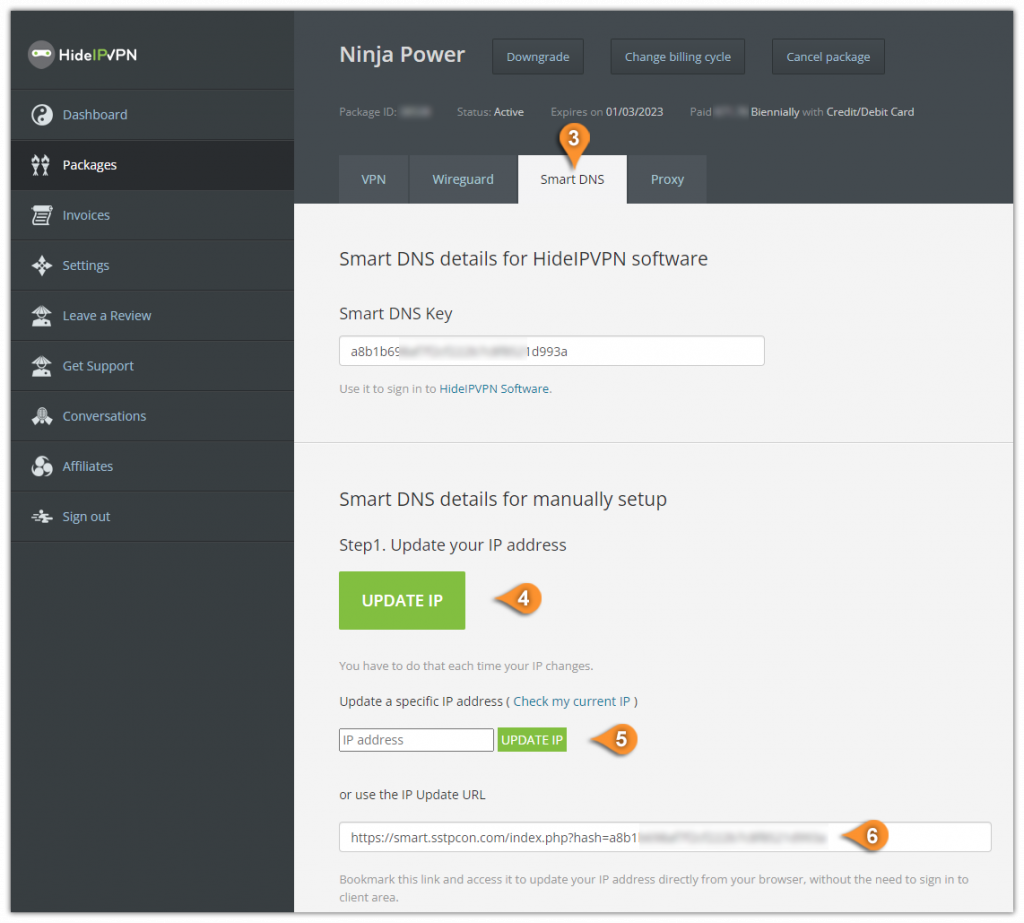
Note: Please do not share the IP Update URL – it is customer unique. Each HideIPVPN user has a different link of this kind. Only one IP address can be updated per user. If you give it away you may lose access to Smart DNS service.
Remember, if your service is not working, check if your IP address (pins 1 to 6) is updated in our database.