HideIPVPN macOS X VPN and Smart DNS software V5
Last updated on November 6th, 2020 in Setup
Welcome to HideIPVPN! This tutorial will guide you through installation process of HideIPVPN VPN & Smart DNS software on macOS.
First you need to download installation package. You can download it from here.
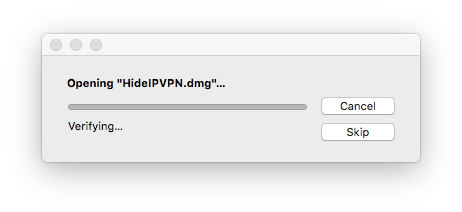
In open window click Save File. Once download has finished, go to Finder. In Downloads look for file HideIPVPN-MacOS-v.5.0.1.pkg. Then double-click on it to start the setup process. After that, your mac will start opening the installation file and begin to install HideIPVPN app.
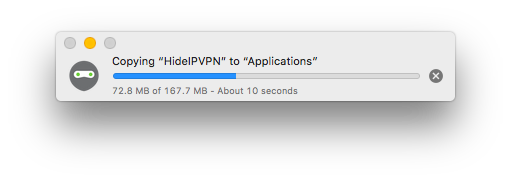
Once the installation ends you will be prompted to drag HideIPVPN app to your Applications folder. You can do it in the open window as it is shown on the screenshot below.
After dragging your mac will copy HideIPVPN app to Applications. Now the setup process is done!
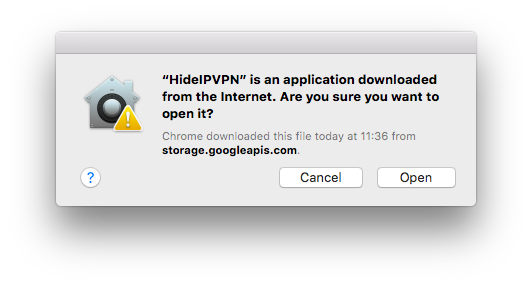
Note: Please note that on the first start of HideIPVPN app you will be asked by your OS if you are sure you want to open this app. It’s because our app is not present in the Apple app store. Press the “Open” button.
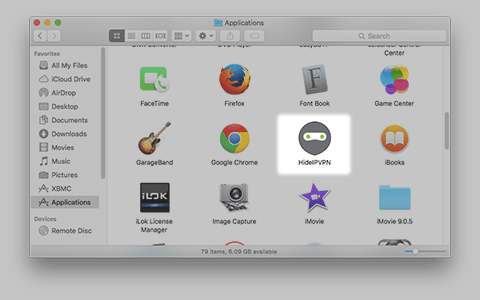
Go to Applications, find HideIPVPN app and open it.
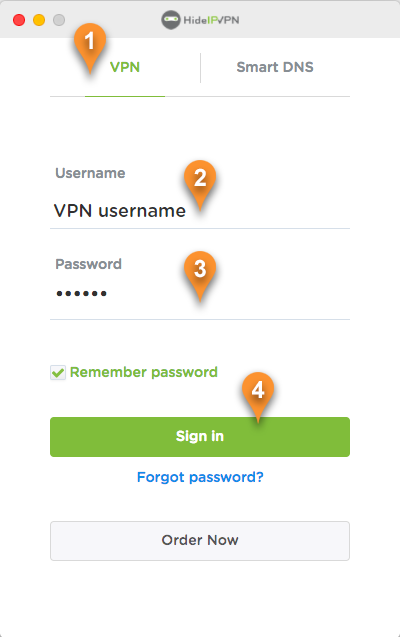
To start using VPN select: the VPN tab (pin 1), then enter your VPN Username (pin 2) and Password (pin 3) as it is shown on the screenshot below and click Sign in (pin 4).
Note: To find out your VPN Username and Password please login to your “Client Area”, then go to “Packages” and select your active package.
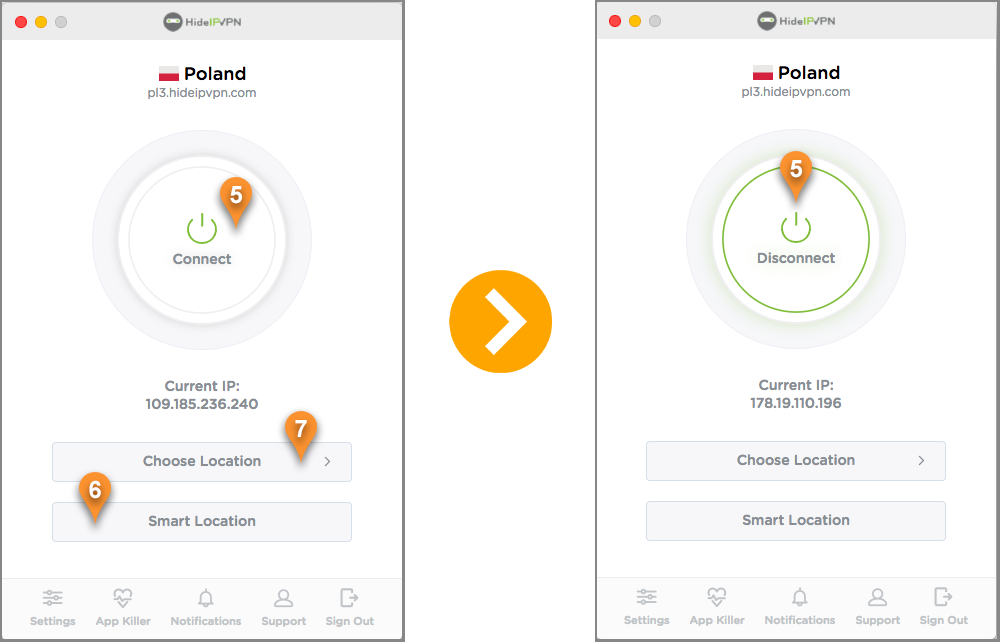
On your VPN Home screen you will find all the main things you need to use VPN. To enable VPN connection all you need to do is to press the “Connect” button (pin 5). Once connection ia established the connection button will become green. To disconnect just press the “Disconnect” button (pin 5, the second image below). To find the nearest and fastest server for you just press on the “Smart Location” button ( pin 6) and in seconds it will start the VPN connection with the closest server to you. If you want to access a specific location press on the “Choose Location” button ( pin 7 ). To find how “Choose Location” works please follow to the next step of this guide.
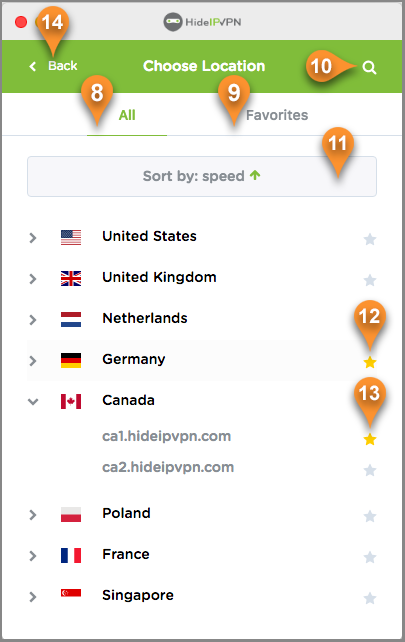
We’ve designed the process of choosing location to make it a child’s play. As you can see in the screenshot below now you can select a server from the full list of servers ( pin 8 ) or your favorites servers(pin 9). You can sort all servers and countries by speed. By pressing on the “Sort by speed” button ( pin 11). Our VPN app will sort automatically all the countries and servers. To list all the servers from a country just press on it. To add a server to you favorites list just click on the servers star ( pin 13). You can also add a whole country to your favorites list by clicking on the star near the country’s name( pin 12 ). To look for a specific country or server click on the magnifying glass ( pin 10 ) and type the country or server name. After choosing a server our app will automatically revert you back to the home screen.
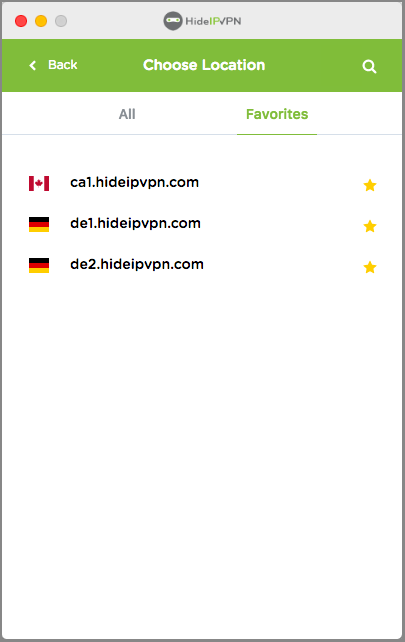
Here is how favorites list looks like
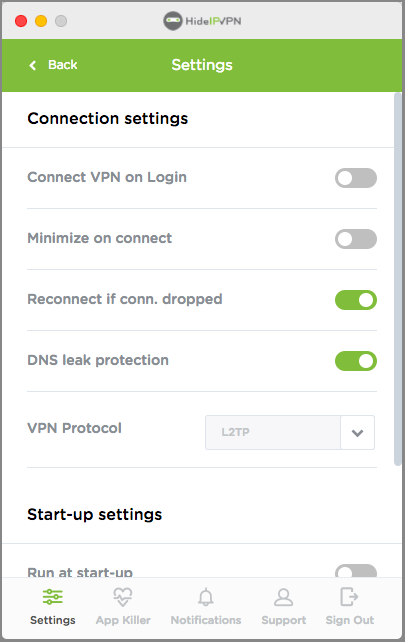
There are 2 main blocks in the settings tab: Connection settings and Start-up settings
What you can enable/disable or change in Connection settings:
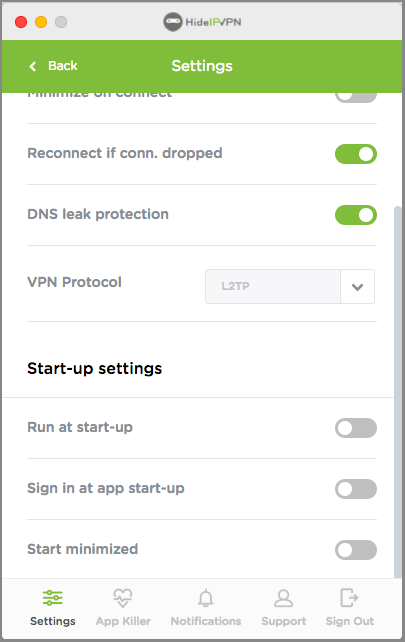
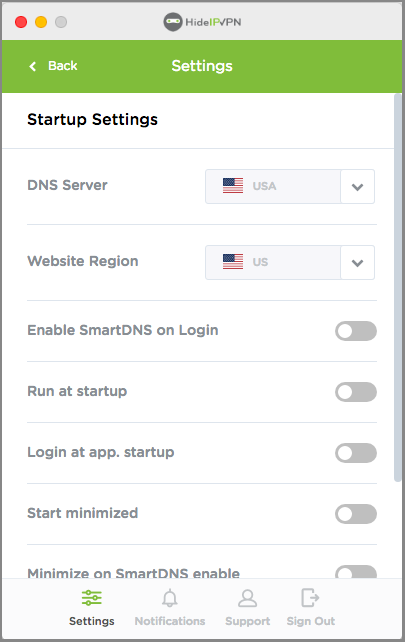
What you can enable/disable or change in Start-up settings:
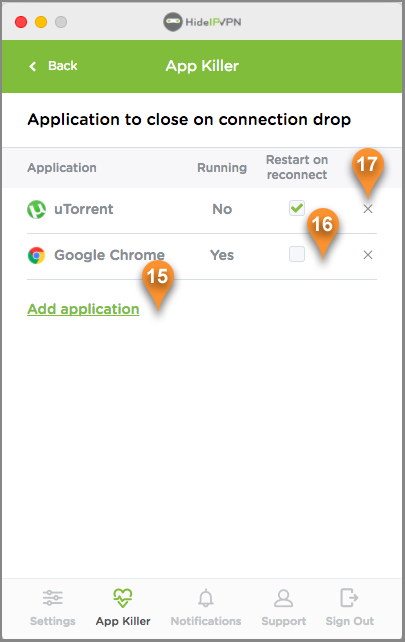
And of course use our Application Killer. This feature provides you with the possibility to automatically close specific apps once VPN connection drops. And of course to restart them once VPN reconnects, you can do this by checking the box from the “Restart on reconnect” column ( pin 16). To add applications to App Killer list simply press on the “Add application” link ( pin 15 ) and select your app. To remove apps from the App Killer list just press the “X” button (pin 17).
Our Notifications and Support tabs are more informative. In notifications you will get messages about latest VPN news, software updates or billing notifications.
In our Support tab you will find the information about the current version on the HideIPVPN software you are using, general information and useful links.
If you want to sign out just press on the Sign Out tab.
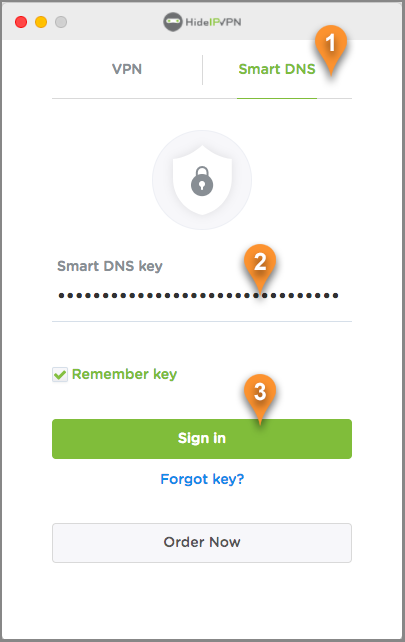
To use our Smart DNS service, please choose the “Smart DNS” tab (pin 1). Then paste your Smart DNS key (pin 2). Once done, click “Sign in” (pin 3).
Note: To find out your Smart DNS key please login to your “Client Area”, then go to active package and find your key in the Smart DNS tab.
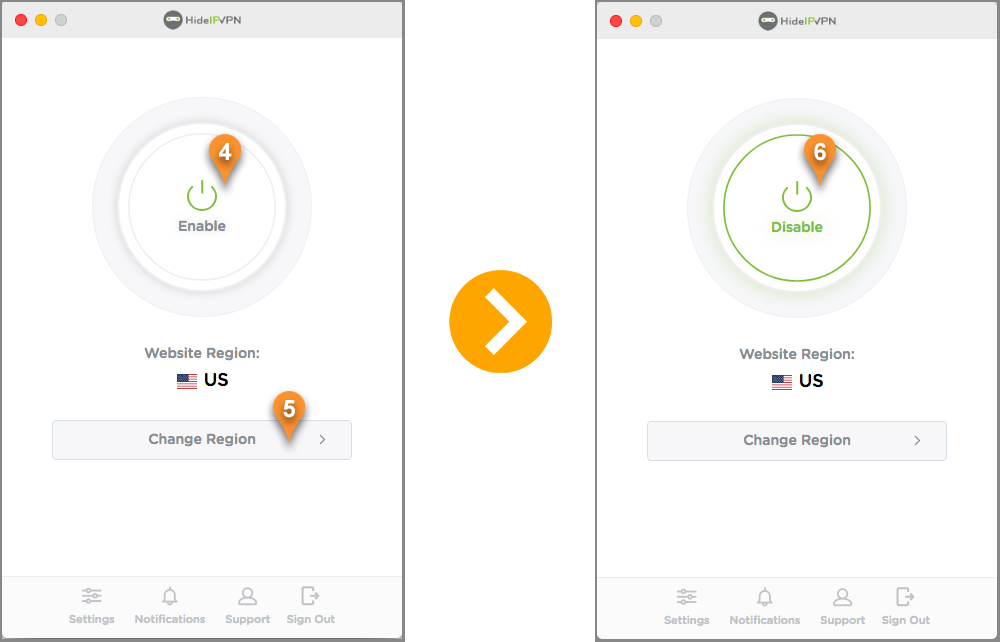
Once you’ve signed in you can enable Smart DNS by pressing the “Enable” button (pin 4). Once the Smart DNS is enabled, the connection button will become green and you can disable it at anytime. To disable Smart DNS press on the “Disable” button (pin 6). Also you can select the Website Region that will be used for multi-regional websites. To change it just press on the “Change Region” button (pin 5).
In Settings tab you can select next features:
Our Notifications and Support tabs are more informative. In notifications you will get messages about latest VPN news, software updates or billing notifications.
In our Support tab you find the information about the current version on the HideIPVPN software you are using, general information and useful links.
If you want to sign out just press on the Sign Out tab.
Thank you for choosing HideIPVPN!