How to setup IKEv2 on macOS X
Last updated on January 24th, 2018 in Setup
Welcome to HideIPVPN. In this tutorial we will show you how to setup IKEv2 on macOS X. But if you want to setup it manually, just follow our instructions.
Important:For an easier and faster connection we recommend you to use our free HideIPVPN software. Also check how to setup an use our VPN and Smart DNS software for macOS.
Note:Before start, you need to have an active VPN account, if you do not have one follow the link –
Get FREE VPN trial account!
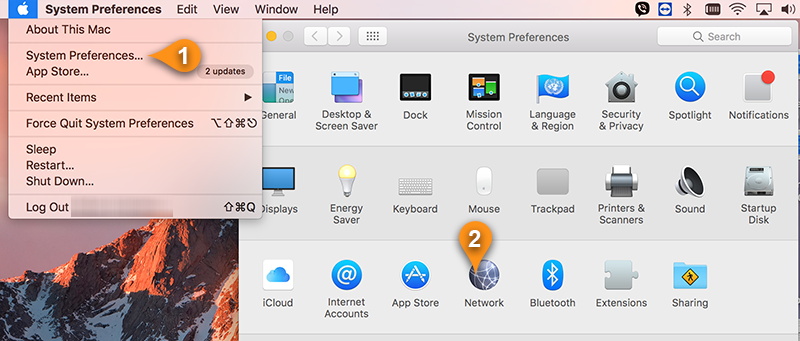
1. Open System Preferences (pin 1) and click on Network (pin 2).
2. Click on the plus (+) button (pin 3) at the bottom left hand corner and you will be prompted to select the Interface and to enter a Service Name. Select VPN for the Interface (pin 4) and then IKEv2 (pin 5) for the VPN Type. For the service name, you can enter anything you like, we used “US5 (IKEv2)” (pin 6).

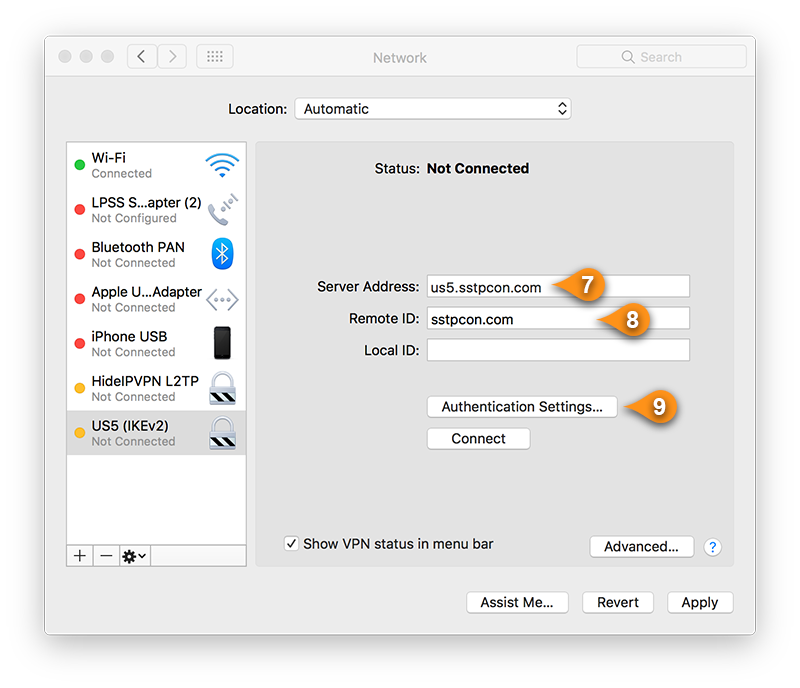
3. You will now have to enter the server address as an example us5.sstpcon.com (pin 7) and Remote ID as sstpcon.com (pin 8). You can also find available servers under your package in Client Area. Next, click on Authentication Settings (pin 9).
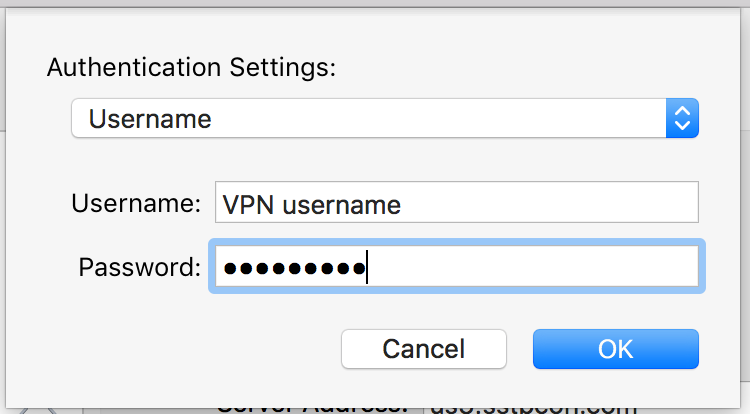
4. Enter your Hideipvpn VPN username and password in the field below and click on OK and then on Apply to complete VPN setup
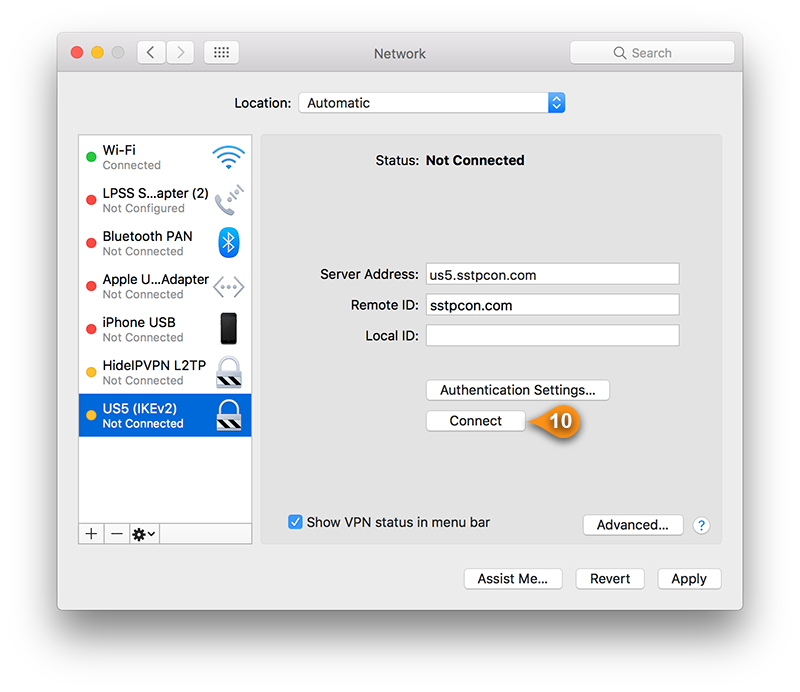
5. Click on the Connect (pin 10)
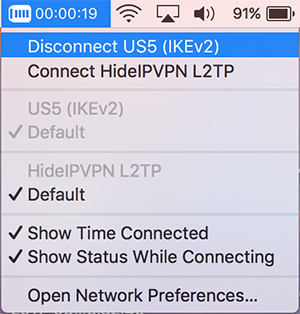
6. The icon on the status bar will show that it is connecting and once connected the timer will be displayed to the right of the icon.
Now you’re done! Enjoy your privacy with IKEv2 on macOS X with HideIPVPN.