How to setup Smart DNS on PlayStation 4
Last updated on June 25th, 2015 in Setup
 Welcome to HideIPVPN. In this tutorial we will show you in easy steps how to setup Smart DNS on PlayStation 4. It will allow you to enjoy lots of geographically restricted apps like Hulu, Amazon, Crackle, WWE and many more.
Before starting please make sure that you have updated your IP Address. This is very important. If your IP is not updated you won’t be able to access geo-restricted apps.
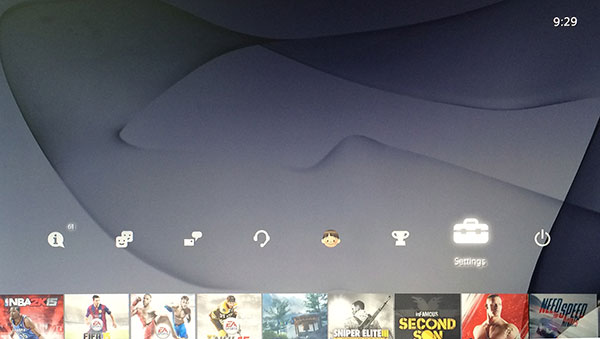
1. Start your PlayStation 4 and in main menu choose “Settings”
2. Scroll down and select Network.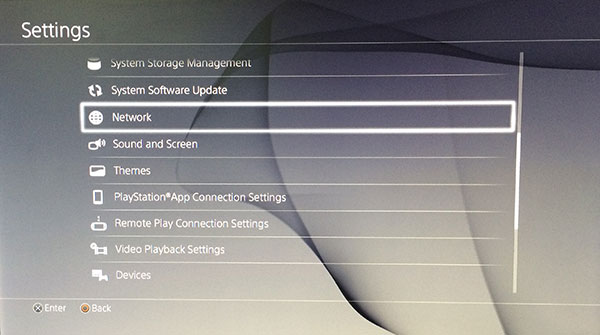
3. To continue select “Set Up Internet Connection”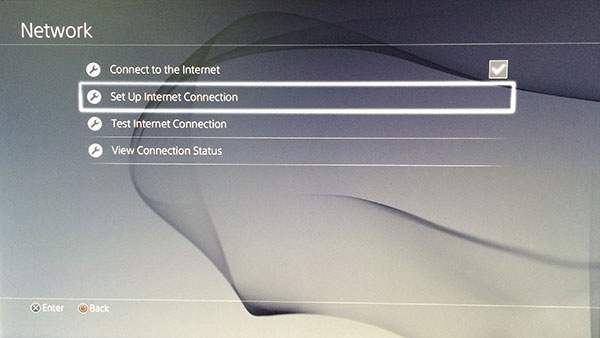
4. Choose how do you want to connect to internet: through Wi-Fi or a LAN Cable.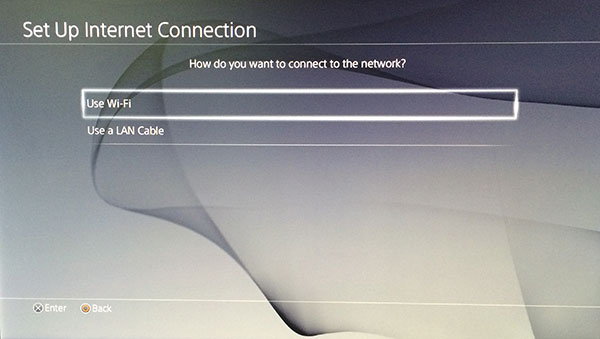
5. For the way to set up the internet connection, please select “Custom”.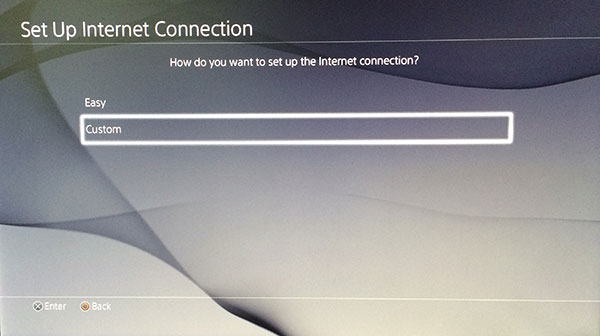
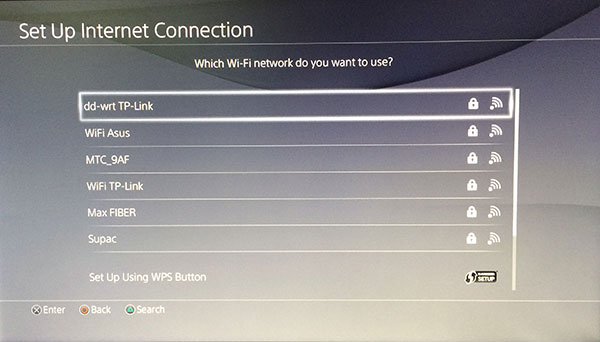
6. In case you are connecting through Wi-Fi, select network you want to use.
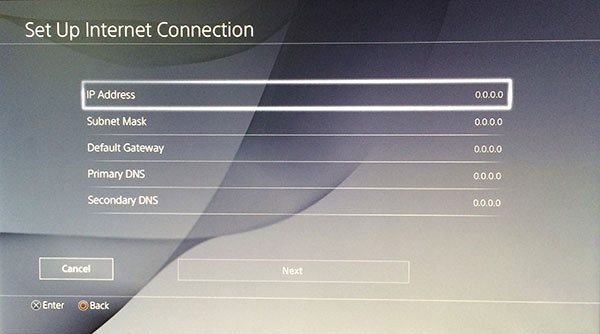
7. Once you are connected please select “Manual” set up of IP Address Settings.
8. Start Completing the fields.
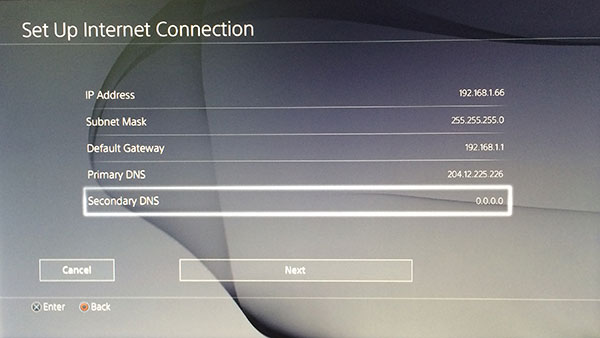
9. For Primary and Secondary DNS please use HideIPVPN DNS. You can find them in your Client Area.
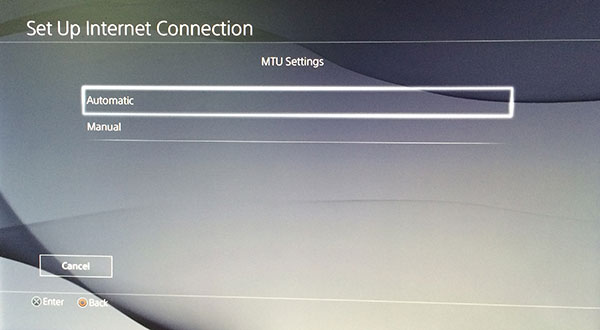
10. MTU Settings choose “Automatic”
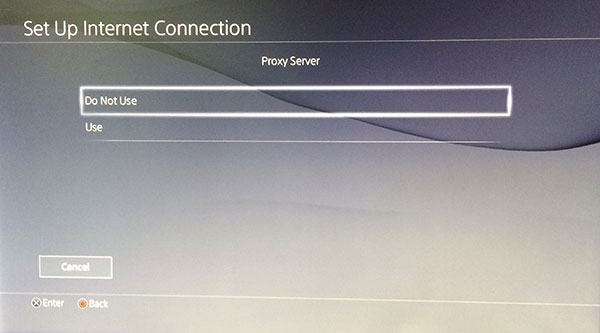
11. And “Do Not Use” Proxy Server
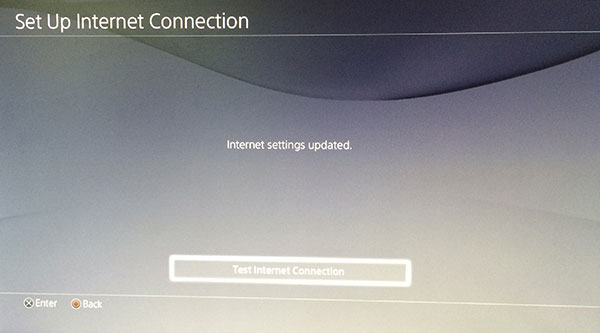
12. Once your screen is same as the image below, you’re done.
Enjoy Smart DNS on PlayStation 4 with HideIPVPN.